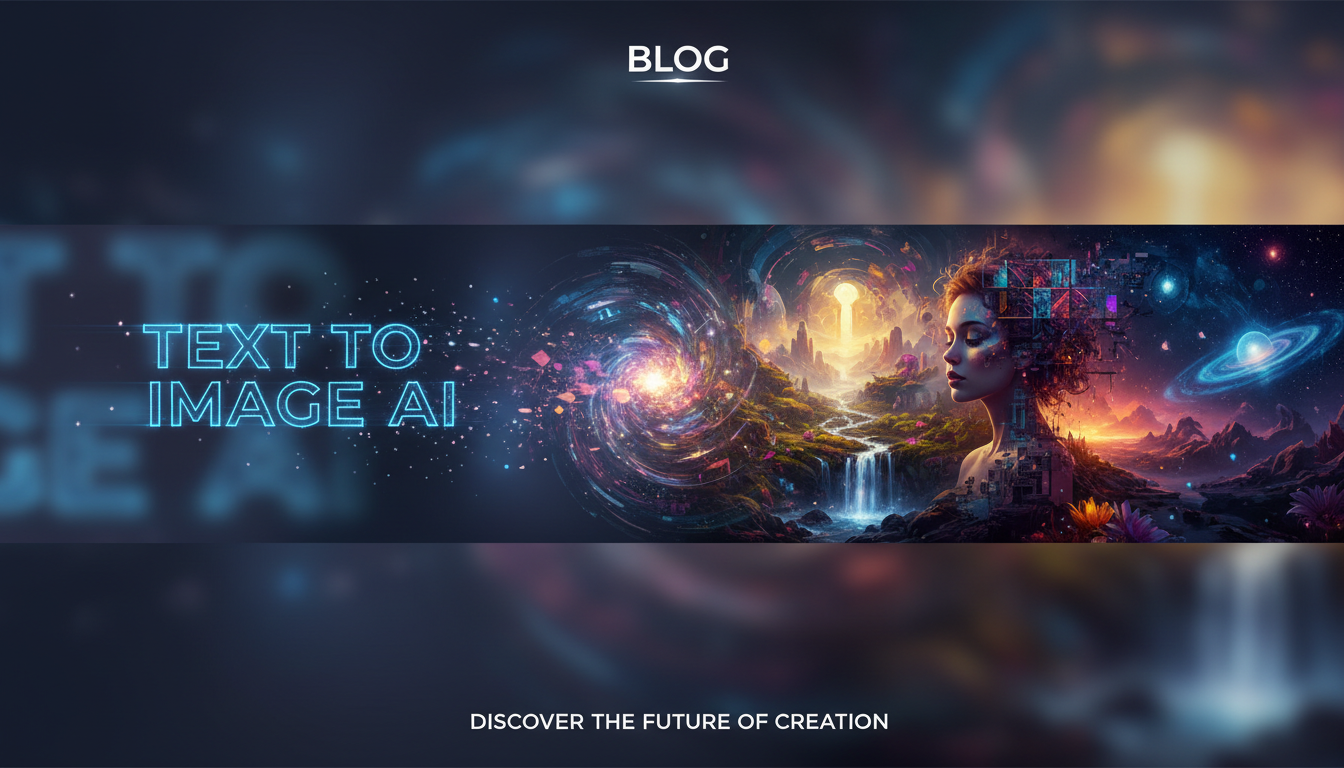
Text to Image AI: How to Turn Words Into Stunning Visuals
Master text-to-image AI generation. Learn prompting techniques, best tools, and proven strategies for creating stunning visuals from text descriptions.
Make AI images and video in your browser
Characters, video, photo packs. No GPU, no setup. Your first generation is free.
The gap between what you imagine and what you can create has never been smaller. Text-to-image AI has matured from a novelty into a genuinely powerful creative tool, and the people getting the best results are the ones who understand how to communicate with these systems. Whether you are designing marketing assets, exploring artistic ideas, or building entire visual worlds from scratch, the quality of your output hinges almost entirely on how you write your prompts.
Quick Answer: AI image generation from text works by translating natural language descriptions into visual output through diffusion models. The key to great results is structured prompting that includes subject, style, lighting, composition, and technical details. Top tools in 2026 include Midjourney v7, DALL-E 4, Flux Pro, and Stable Diffusion 3.5, each with different strengths for different use cases.
- Prompt structure matters more than prompt length. A well-organized 30-word prompt beats a rambling 100-word one.
- Negative prompts are just as important as positive ones for controlling output quality.
- Different AI tools interpret the same prompt differently. Learning each tool's language is essential.
- Camera and lens references give you precise control over composition and mood.
- Style mixing and weighted tokens unlock creative possibilities that simple prompts cannot reach.
- Real-world professional workflows combine multiple tools and iterative refinement.
How Text-to-Image AI Actually Works
Before diving into prompting techniques, it helps to have a basic mental model of what happens when you type words into an image generator. You do not need to understand the math, but knowing the general process will make you a better prompter because you will understand why certain phrasing choices produce better results than others.
Modern text-to-image systems use diffusion models. The simplest way to think about this is that the AI starts with pure visual noise and gradually removes that noise in a guided direction based on your text prompt. Your words get converted into numerical representations (called embeddings) by a text encoder, and those embeddings steer the denoising process toward an image that matches your description. If you want a deeper dive into the underlying technology, check out our complete guide to how AI image generation works.
The practical takeaway here is important. The model is not "drawing" your image the way a human artist would, starting with a sketch and adding detail. Instead, it is resolving your entire image simultaneously from noise, which means every part of your prompt influences every part of the image at once. This is why prompt structure and specificity matter so much. Vague prompts give the model too much freedom, and the result tends to look generic. Specific, well-structured prompts constrain the output in productive ways.
I have been testing AI image generation from text across dozens of tools over the past two years, and the single biggest improvement in my results came not from switching tools but from learning how to write better prompts. The tool matters, but your prompting skill is the multiplier.
The Anatomy of a Great Text-to-Image Prompt
Writing effective prompts is both a skill and an art. Most people start by typing a simple sentence like "a cat sitting on a couch" and wonder why the results look flat and uninspired. The difference between that beginner prompt and a professional-quality one comes down to structure.
Think of your prompt as having layers. Each layer adds specificity and control, and the more layers you include, the more precisely you can steer the output. After generating tens of thousands of images across different platforms, I have settled on a framework that consistently produces strong results.
Here is the structure I recommend:
- Subject - What is in the image (be specific about appearance, pose, expression)
- Environment/Setting - Where the subject exists (background, location, surroundings)
- Style - The artistic approach (photorealistic, watercolor, digital art, oil painting)
- Lighting - How the scene is lit (golden hour, studio lighting, dramatic shadows)
- Composition - Camera angle, framing, depth of field
- Technical Quality - Resolution cues, rendering quality hints
Let me show you the difference this makes in practice:
Basic prompt: "A woman in a garden"
Structured prompt: "Portrait of a young woman with auburn hair standing in an English cottage garden, soft natural afternoon light filtering through climbing roses, shallow depth of field, shot on Canon EOS R5 with 85mm f/1.4 lens, warm color palette, editorial photography style"
The second prompt gives the AI model clear direction on virtually every visual decision it needs to make. The result is dramatically more controlled and professional looking.
One thing I want to emphasize based on my testing at Apatero: prompt length is not the same as prompt quality. I have seen people write 200-word prompts that produce worse results than a tight 40-word prompt because the long version was full of contradictions and redundant descriptions. Quality and clarity beat length every time.
Common Prompting Mistakes That Kill Your Results
Even experienced users fall into patterns that limit their output quality. I see these mistakes constantly in community forums, and I made most of them myself when I started with ai image creation from text. Understanding what not to do is just as valuable as learning what to do.
The first major mistake is being too abstract. Prompts like "something beautiful and inspiring" give the model almost nothing to work with. AI models respond to concrete visual descriptors, not emotional concepts. Instead of "a peaceful scene," try "a still mountain lake at dawn with mist rising from the water surface, pine trees reflected in the glassy water." The model can translate those specific visual details into pixels.
The second mistake is contradictory instructions. Asking for "a photorealistic watercolor painting" confuses the model because photorealism and watercolor are fundamentally different rendering approaches. Pick a direction and commit to it. If you want watercolor with realistic proportions, say "watercolor painting with anatomically accurate proportions" instead.
Here are the most common mistakes I see:
- Keyword stuffing - Cramming every quality modifier ("8k, ultra detailed, masterpiece, best quality, award winning") rarely helps and can actually degrade results in modern models
- Ignoring aspect ratio - Generating square images for content that needs a landscape format wastes a generation cycle
- No lighting direction - Leaving lighting unspecified produces flat, evenly-lit images that look artificial
- Forgetting negative prompts - Not telling the model what to avoid means you are relying entirely on luck
- Copy-pasting prompts between tools - A prompt optimized for Midjourney will produce different results in DALL-E or Flux
The third mistake is what I call "prompt tourism," which is copying prompts you find online without understanding why they work. A prompt that produces stunning results in Midjourney v6 might produce mediocre output in Flux Pro because each model has been trained differently and responds to different token patterns. Take the time to understand the principles behind good prompts, and you will get better results everywhere.
Choosing the Right Tool for Text-to-Image Generation
The landscape of ai image generation from text tools is competitive and constantly evolving. Each major platform has distinct strengths, and the right choice depends on what you are trying to create. I have spent months running comparison tests across every major tool, and here is my honest assessment for 2026. For a more detailed breakdown, see our comprehensive AI image generator comparison.
Midjourney v7 remains the strongest option for aesthetic quality out of the box. Its default style tends toward "beautiful" in a way that requires less prompt engineering to achieve pleasing results. It excels at portraits, landscapes, and anything where you want the image to look polished without specifying every detail. The downside is that it can feel like it has a "Midjourney look" that is hard to escape.
DALL-E 4 has made significant strides in prompt adherence. If you write a detailed prompt with specific spatial relationships ("a red ball to the left of a blue cube"), DALL-E 4 is consistently the most accurate at placing elements where you described them. It is also the best at rendering readable text within images, which matters for social media graphics and marketing materials.
Flux Pro is my personal go-to for professional work. It offers the best balance of quality, control, and versatility. The prompt following is excellent, the photorealism capabilities are outstanding, and it handles complex multi-subject scenes better than any competitor. On Apatero, I have been documenting detailed comparisons of these tools with side-by-side examples that show exactly where each one excels.
Stable Diffusion 3.5 (local) is the best option if you need complete control and privacy. Running locally means direct model access, no per-image costs after hardware investment, and the ability to fine-tune models on your own data. The trade-off is a steeper learning curve and the need for capable hardware.
Here is a quick comparison for different use cases:
| Use Case | Best Tool | Why |
|---|---|---|
| Quick social media graphics | DALL-E 4 | Text rendering, ease of use |
| Fine art and illustrations | Midjourney v7 | Aesthetic defaults, style range |
| Product photography | Flux Pro | Photorealism, lighting control |
| Bulk content creation | SD 3.5 (local) | No per-image cost, automation |
| Concept art | Midjourney v7 | Creative interpretation |
| Technical diagrams | DALL-E 4 | Spatial accuracy |
Advanced Prompting Techniques That Professionals Use
Once you have the basics down, there are several advanced techniques that can dramatically expand what you can achieve with text-to-image AI. These are the techniques I use daily for professional work, and they are what separate casual users from people who produce genuinely impressive output.
Free ComfyUI Workflows
Find free, open-source ComfyUI workflows for techniques in this article. Open source is strong.
Negative Prompts
Negative prompts tell the model what to avoid, and they are arguably as important as your main prompt. Think of it this way. Your positive prompt is the destination, and your negative prompt is the guardrails that keep you on the road. Without guardrails, you might end up somewhere interesting, but you are just as likely to drive off a cliff.
Effective negative prompting is not about listing every possible flaw. It is about targeting the specific issues you have seen in previous generations. If your portraits keep coming out with distorted hands, add "deformed hands, extra fingers, fused fingers" to your negative prompt. If your landscapes keep including unwanted people, add "person, figure, human" to the negatives.
Here is a solid general-purpose negative prompt template that I start with and modify for each project:
blurry, low quality, distorted, deformed, watermark, text overlay,
oversaturated, underexposed, cropped, out of frame, duplicate,
morbid, mutilated, extra limbs, poorly drawn face
The key is to iterate. Run a generation, identify what went wrong, add those specific issues to your negative prompt, and regenerate. This feedback loop is how you converge on excellent results.
Style Mixing and Blending
One of the most powerful techniques for creating unique visuals is combining multiple artistic styles in a single prompt. Instead of asking for "a painting," you can ask for "a blend of Art Nouveau linework with cyberpunk color palettes" or "Studio Ghibli character design rendered with the lighting of a Caravaggio painting." These style combinations produce results that feel fresh and distinctive.
I stumbled onto this technique by accident about a year ago. I was trying to generate concept art for a personal project and accidentally left two style references in my prompt. The result was unlike anything I had seen from either style individually, and I have been deliberately mixing styles ever since. It is one of the most creatively rewarding aspects of ai image generation from text.
Some effective style combinations to try:
- Art Deco + Sci-fi - Geometric patterns meet futuristic subjects
- Impressionist + Urban Photography - City scenes with painterly light
- Japanese Woodblock + Modern Fashion - Traditional techniques with contemporary subjects
- Baroque + Minimalism - Rich detail constrained to simple compositions
- Watercolor + Technical Illustration - Loose artistic rendering with precise subject detail
Camera and Lens References
This is my hot take, and I stand by it completely: adding camera and lens references to your prompts is the single most underrated technique in text-to-image AI. Most people do not realize that these models have been trained on millions of photographs with EXIF data and photographer discussions, so they understand what "shot on Hasselblad X2D with 90mm f/2.5" looks like versus "iPhone 15 Pro wide angle."
Specifying camera gear in your prompt gives you control over:
- Depth of field - An 85mm f/1.2 produces creamy bokeh, a 24mm f/8 keeps everything sharp
- Perspective distortion - Wide angles exaggerate perspective, telephotos compress it
- Color science - Different camera brands have different color renderings
- Overall mood - Film cameras (Kodak Portra 400, Fuji Velvia 50) add specific color tones
Here are some camera references I use regularly:
Portrait: "shot on Canon EOS R5 with RF 85mm f/1.2L, natural window light"
Landscape: "captured on Fujifilm GFX 100S with 32-64mm, golden hour"
Street: "Leica M11 with 35mm Summicron, available light, slight grain"
Product: "Phase One XT with Schneider 120mm, studio strobes, white seamless"
Cinematic: "Arri Alexa 35, anamorphic lens flare, 2.39:1 aspect ratio"
Weighted Tokens and Emphasis
Most advanced platforms allow you to weight certain parts of your prompt more heavily than others. In Stable Diffusion and Flux, you use parentheses and numerical weights like (detailed eyes:1.4) to increase emphasis or (background:0.6) to decrease it. Midjourney uses a different syntax with :: separators and weight values.
This technique is incredibly useful when the model keeps focusing on the wrong part of your prompt. If you want a portrait but the model keeps making the background the star of the image, you can increase the weight on your subject description and decrease it on the environment. I have found that subtle weight adjustments (1.1 to 1.3 range) produce better results than extreme ones, which can cause artifacts and distortion.
Want to skip the complexity? Apatero gives you professional AI results instantly with no technical setup required.
Building an Effective Text-to-Image Workflow
Having the right tools and techniques is only half the battle. The other half is having a workflow that lets you iterate efficiently and consistently produce quality results. After two years of daily use, here is the workflow I have refined for professional text-to-image work.
The first step is always research and reference gathering. Before I write a single prompt, I spend time looking at reference images that capture the mood, composition, or style I am aiming for. This is not about copying. It is about training your eye and building a visual vocabulary. Pinterest, Behance, and ArtStation are excellent for this. I keep a reference folder organized by project.
Next comes prompt drafting. I write my first draft prompt using the layered structure I described earlier (subject, environment, style, lighting, composition, technical). This first draft is rarely perfect, and that is fine. The goal is to get a solid starting point.
Then I enter the iteration cycle:
- Generate 4-8 variations with the initial prompt
- Evaluate results against the reference images and project goals
- Identify gaps between what I got and what I wanted
- Refine the prompt by adding specificity where the model went wrong
- Add negative prompts targeting specific issues I saw
- Regenerate and repeat until satisfied
The typical professional image requires 3-5 iteration cycles to nail. Beginners often give up after the first generation, but the magic happens in the refinement. If you want a step-by-step walkthrough of this process, our guide to generating AI images covers every stage in detail.
One workflow tip that saved me enormous amounts of time: keep a prompt journal. Every time you create an image you are happy with, save the final prompt, the tool you used, and any settings you applied. After a few months, you will have a personal library of proven prompts that you can adapt for new projects. I maintain mine in a simple Notion database, and it has become one of my most valuable creative resources.
Real-World Applications and Use Cases
Text-to-image AI is no longer just for making cool art to share on social media. Businesses and professionals across dozens of industries are using ai image generation from text as a core part of their workflows. The applications keep expanding as the technology improves, and the people adopting these tools early are gaining a meaningful competitive advantage.
In marketing and advertising, teams are using text-to-image AI to rapidly prototype campaign visuals. Instead of briefing a photographer, scheduling a shoot, and waiting days for edited images, a marketing manager can generate concept images in minutes and iterate on the creative direction before committing budget to production. I recently spoke with a creative director at a mid-size agency who told me their concept-to-approval timeline dropped from two weeks to two days after integrating AI image generation into their process.
E-commerce product visualization is another area where this technology shines. Brands can generate lifestyle images showing their products in various settings without organizing expensive photo shoots for every scenario. A furniture company can show the same sofa in a modern loft, a cozy cottage, and a minimalist apartment, all generated from text descriptions in an afternoon.
Other professional applications include:
- Book covers and publishing - Authors and small publishers can create professional cover concepts without hiring a designer for initial exploration
- Game development - Concept artists use text-to-image as a rapid ideation tool, generating dozens of visual concepts in the time it would take to sketch one
- Architecture and interior design - Visualizing spaces before they are built, exploring material and color combinations
- Education and training - Creating custom illustrations for course materials and presentations
- Social media content - Producing unique, on-brand visual content at scale
My second hot take: within the next two years, every professional who works with visual content will need basic text-to-image prompting skills, just as every professional today needs basic spreadsheet skills. It is becoming that fundamental to visual communication. The team at Apatero has been covering these industry shifts extensively because we believe understanding these tools early creates a genuine professional advantage.
Comparing Results Across Different Tools
One of the most instructive exercises you can do is run the same prompt through multiple AI image generators and compare the results. This teaches you each tool's personality, which is the best word I can find for it, because each tool really does interpret prompts in characteristically different ways.
Earn Up To $1,250+/Month Creating Content
Join our exclusive creator affiliate program. Get paid per viral video based on performance. Create content in your style with full creative freedom.
I ran this exact experiment last month with a moderately complex prompt: "A weathered fisherman mending nets on a misty dock at dawn, golden light breaking through fog, shot on medium format camera, editorial portrait style." The results were revealing.
Midjourney produced the most aesthetically polished version with beautiful atmospheric effects, but it took creative liberties with the fisherman's appearance that were not in my prompt. DALL-E 4 was the most literal in following the prompt details but produced a slightly flatter lighting result. Flux Pro hit the sweet spot for my taste, delivering both prompt accuracy and atmospheric quality. Stable Diffusion 3.5 required more iteration but gave me the most control over fine details when I dialed in the settings.
The lesson is not that one tool is universally better. The lesson is that matching the right tool to the right project saves you significant time and effort. For tips on getting the most from whatever tool you choose, check out our guide to creating AI images like a pro.
Here is what I noticed about each tool's tendencies:
- Midjourney - Adds artistic flair you did not ask for (sometimes wonderful, sometimes unwanted)
- DALL-E 4 - Most literal prompt interpretation, least creative deviation
- Flux Pro - Best balance of accuracy and aesthetic enhancement
- SD 3.5 - Most controllable but requires the most skill to get top results
Tips for Consistently Great Output
Consistency is the hallmark of professional work, and achieving it with AI image generation requires discipline and methodology. Random prompting produces random results. Systematic prompting produces reliable quality.
Temperature and sampling settings matter more than most people realize. Most tools expose some version of a "creativity" or "guidance" slider. Higher guidance values make the model follow your prompt more strictly, while lower values allow more creative interpretation. For professional work where I need a specific outcome, I typically use higher guidance (7-9 range in Stable Diffusion terms). For creative exploration, I drop it lower (3-5) and let the model surprise me.
Seed values are another overlooked tool. When you find a composition you like but want to tweak the colors or style, using the same seed value keeps the overall structure similar while applying your prompt changes. This is essentially how you "edit" an AI-generated image through text alone, and it is far more efficient than starting from scratch each time.
Here are my top consistency tips from years of daily practice:
- Create template prompts for recurring work (product shots, portraits, landscapes) and modify the specifics for each project
- Batch your generations by type. Do all your portrait work together, then switch to landscapes. This keeps your prompt-writing mindset focused
- Document what works in your prompt journal. Include the tool, settings, and final prompt
- Use a consistent naming convention for saved images so you can find them later
- Set up preset negative prompts for different content types and load them automatically
- Review your work critically and honestly. Not every generation is portfolio-worthy, and learning to quickly identify and discard mediocre output saves time
The Ethics and Limitations You Should Know About
No guide on text-to-image AI would be complete without addressing the ethical considerations and practical limitations of this technology. Being informed about these issues makes you a more responsible and ultimately more effective user.
Current AI image generators have notable limitations. They still struggle with hands and fingers, though this has improved dramatically in 2026 compared to earlier models. Complex spatial relationships (like "object A behind object B, next to object C, above object D") can produce unpredictable results. Text rendering within images has improved with DALL-E 4 but remains imperfect across most tools. And generating consistent characters across multiple images remains one of the hardest challenges, though techniques like LoRA training and IP-Adapter are making it more achievable.
On the ethical side, the training data question remains significant. Most major models were trained on datasets that included copyrighted work, and the legal landscape is still evolving. If you are using AI-generated images commercially, understand the licensing terms of the tool you are using. Midjourney, DALL-E, and Flux all have different commercial use policies, and they matter for your business.
There is also the question of disclosure. My third hot take on this topic: I believe you should always disclose when an image is AI-generated, especially in commercial and editorial contexts. Not because you are legally required to in most jurisdictions (though some are heading that direction), but because transparency builds trust. The Creative Commons organization has been doing important work on frameworks for AI-generated content attribution, and I recommend following their guidelines.
Prompt Engineering Resources and Communities
Getting better at text-to-image prompting is a continuous learning process, and the community resources available in 2026 are excellent. Beyond the guides and comparisons we publish on Apatero, there are several other resources worth knowing about.
The Midjourney community showcase is an incredible resource for seeing what is possible and reverse-engineering effective prompts. Users often share their prompts alongside finished images, which lets you study the relationship between text input and visual output. Similarly, Civitai and the various Stable Diffusion subreddits are treasure troves of prompting knowledge, particularly for local model users.
For formal learning, several platforms now offer structured courses on AI prompt engineering specifically for image generation. These tend to be worth the investment if you are using these tools professionally, because the structured approach fills gaps that self-directed learning often misses.
Practice is ultimately the best teacher. Set yourself creative challenges. Try to generate a specific image you have in your head and study why your results diverge from your mental image. That gap between intention and output is where all the learning happens, and closing it systematically is what turns a beginner into an expert.
Frequently Asked Questions
What is the best AI tool for text-to-image generation in 2026?
There is no single "best" tool because it depends on your needs. For overall quality and ease of use, Midjourney v7 is excellent. For prompt accuracy and text rendering, DALL-E 4 leads. For professional photorealism and control, Flux Pro is my recommendation. For unlimited local generation, Stable Diffusion 3.5 with ComfyUI is unbeatable. Test multiple tools with the same prompt to find which one matches your workflow best.
How many words should a text-to-image prompt be?
The ideal prompt length varies by tool, but 30-60 words is the sweet spot for most platforms. Focus on quality and specificity rather than length. A concise 35-word prompt with clear subject, style, lighting, and composition directions will outperform a 150-word prompt stuffed with redundant quality modifiers. Every word in your prompt should add unique visual information.
Can AI generate photorealistic images from text descriptions?
Yes, modern AI tools can produce images that are nearly indistinguishable from photographs. Flux Pro and Midjourney v7 are particularly strong at photorealism. The key is using camera and lens references, specifying realistic lighting conditions, and avoiding style descriptors that pull the output toward artistic rendering. Adding references like "editorial photography" or "shot on Canon EOS R5" helps steer the model toward photorealistic output.
What are negative prompts and why do they matter?
Negative prompts tell the AI model what to exclude from the generated image. They are supported in Stable Diffusion, Flux, and several other platforms. Using negative prompts gives you much finer control over output quality by preventing common issues like distorted anatomy, unwanted artifacts, or stylistic elements you want to avoid. Think of them as guardrails that keep your generation on track.
How does ai image creation from text differ from image-to-image generation?
Text-to-image starts from pure noise and builds an image entirely from your text description. Image-to-image takes an existing image as a starting point and modifies it based on your text prompt. Image-to-image is useful for editing, style transfer, and variations, while text-to-image is better for creating completely new visuals from scratch. Many professional workflows combine both approaches.
Is AI-generated art copyrightable?
The legal landscape is still evolving. In the United States, the Copyright Office has ruled that purely AI-generated images cannot be copyrighted, but images with sufficient human creative input (such as significant post-processing or use as part of a larger work) may qualify. Other jurisdictions have different rules. If copyright protection matters for your use case, consult a legal professional familiar with AI and intellectual property law.
How can I maintain character consistency across multiple AI-generated images?
Character consistency remains one of the biggest challenges in ai image generation from text. The most reliable methods include using LoRA models trained on your character, IP-Adapter for reference-based generation, seed locking for minor variations, and detailed character description sheets that you include in every prompt. Flux and Stable Diffusion offer the most tools for this, while Midjourney's character reference feature has also improved significantly.
What hardware do I need to run text-to-image AI locally?
For local generation with Stable Diffusion or Flux, you need a GPU with at least 8GB of VRAM (12GB or more recommended). An NVIDIA RTX 3060 12GB is the minimum practical choice, while an RTX 4070 Ti or higher provides a comfortable experience. You will also want at least 32GB of system RAM and an SSD for model storage. Apple Silicon Macs (M2 Pro and above) can also run local models through optimized implementations.
How much does AI image generation cost?
Costs vary significantly. Local generation is free after hardware investment. Cloud services charge per image, typically ranging from $0.01 to $0.10 per image. Midjourney subscriptions start at $10 per month for basic access. DALL-E 4 uses a credit system. For high-volume professional use, local generation becomes cost-effective after a few months of use when compared to per-image cloud pricing.
Can I use AI-generated images for commercial purposes?
Yes, most major platforms allow commercial use of generated images, though the specific terms vary. Midjourney allows commercial use on all paid plans. DALL-E 4 grants usage rights for commercial purposes through the OpenAI API and ChatGPT Plus. Stable Diffusion models are generally open-source with permissive licenses. Always check the specific license terms for the model and platform you are using, as restrictions can apply to certain content types or use cases.
Make AI images and video in your browser
Characters, video, photo packs. No GPU, no setup. Your first generation is free.
Related Articles

10 Best AI Influencer Generator Tools Compared (2025)
Comprehensive comparison of the top AI influencer generator tools in 2025. Features, pricing, quality, and best use cases for each platform reviewed.

5 Proven AI Influencer Niches That Actually Make Money in 2025
Discover the most profitable niches for AI influencers in 2025. Real data on monetization potential, audience engagement, and growth strategies for virtual content creators.

AI Action Figure Generator: How to Create Your Own Viral Toy Box Portrait in 2026
Complete guide to the AI action figure generator trend. Learn how to turn yourself into a collectible figure in blister pack packaging using ChatGPT, Flux, and more.