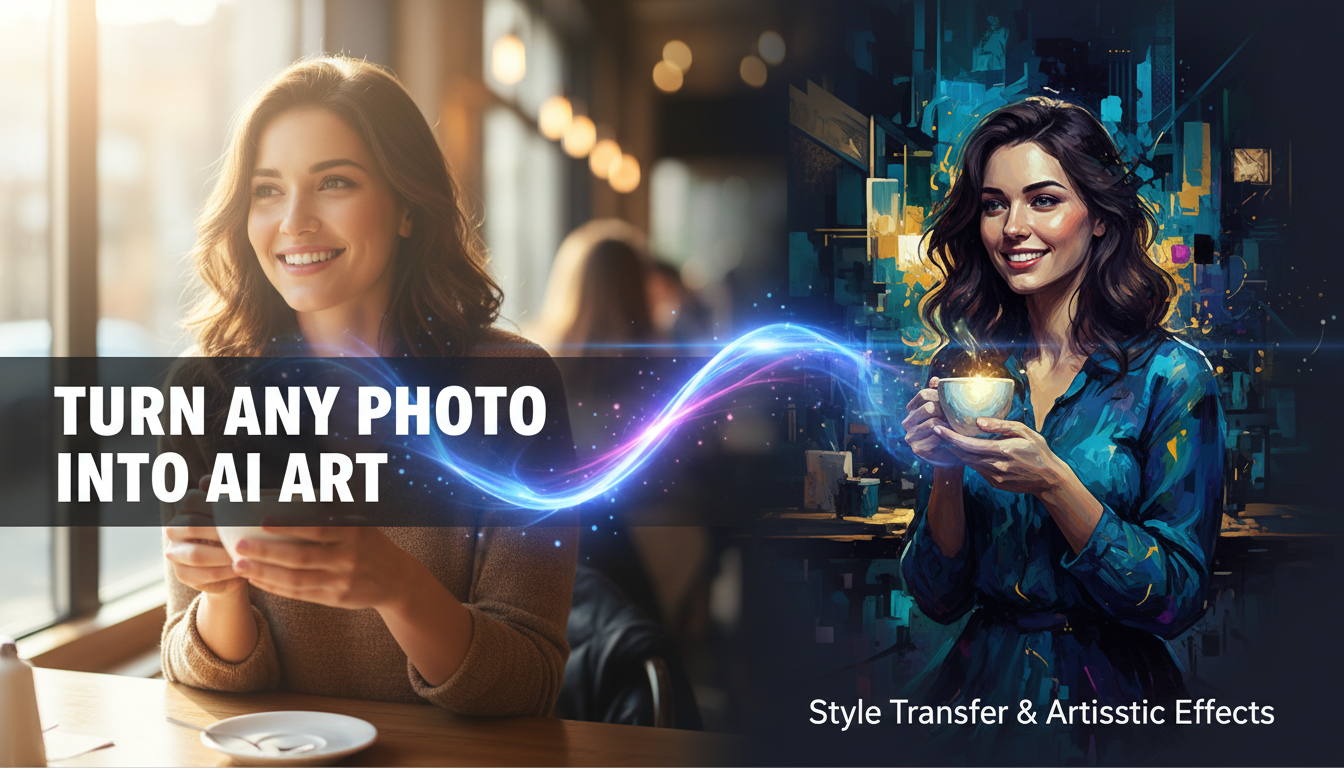
Turn Any Photo Into AI Art: Transform Your Images Instantly
Learn how to turn any photo into AI art. Step-by-step guide to transforming your images with AI tools for stunning artistic results.
Make AI images and video in your browser
Characters, video, photo packs. No GPU, no setup. Your first generation is free.
Somewhere in your phone right now, there are hundreds of photos that never made it to social media. Maybe the lighting was off. Maybe you looked slightly weird. Maybe the composition was bland and you moved on before even opening the editing app. I know because I have thousands of those forgettable shots sitting on my hard drive, collecting digital dust.
But here's what changed everything for me. AI can take those throwaway photos and transform them into something genuinely striking. Not just a filter. Not just a color shift. A complete reimagining of the image as a painting, an illustration, a 3D render, or something entirely new that still captures the essence of the original moment.
Quick Answer: To turn any photo into AI art, use an image-to-image (img2img) tool like Stable Diffusion, Midjourney, or an accessible platform like Apatero. Upload your photo, choose an art style, adjust the transformation strength (denoise), and generate. The whole process takes under a minute once you understand the basics. Free tools like Stable Diffusion offer unlimited transformations, while paid services offer convenience.
- Any photo can be transformed into AI art using image-to-image technology
- Denoise strength is the single most important setting. It controls how much the AI changes your original photo
- Different tools excel at different transformation styles. Midjourney for painterly, Stable Diffusion for variety, Flux for realism
- High-quality source photos produce better results, but even mediocre snapshots work well
- You can create AI art from images for free using open-source tools or limited free tiers
- 3D character transformations, anime styles, and oil painting effects are the most popular use cases
Why Turn Your Photos Into AI Art?
You might be wondering why you'd bother running your photos through an AI when you could just apply an Instagram filter. Fair question. But once you see the difference, you'll understand why millions of people are doing this every day.
Traditional photo filters are surface-level adjustments. They tweak colors, add grain, adjust contrast. The image underneath is fundamentally the same. AI transformation is something completely different. The AI actually understands the content of your photo. It recognizes faces, objects, environments, depth, and lighting. Then it rebuilds the image from scratch in a new artistic style while preserving the composition and meaning of the original.
I first tried generating ai from image when style transfer was still a novelty. Back in 2022, the results were rough. Faces would distort. Backgrounds would melt into abstract noise. It looked like a cool tech demo, not something you'd actually want to display. Fast forward to 2026, and the technology has leapfrogged expectations. The transformations are coherent, detailed, and genuinely artistic.
Here's why people are actually doing this in practice:
- Social media content that stands out. Everyone's photos look the same. Turning yours into stylized art immediately grabs attention.
- Personalized gifts and prints. Turn a family photo into a Renaissance-style painting or a pet portrait into a watercolor illustration.
- Professional creative work. Designers and artists use photo-to-AI as a starting point for concept art, storyboards, and visual development.
- Preserving memories differently. Transform old, low-quality photos into artistic representations that highlight the emotion rather than the technical quality.
- Just plain fun. Sometimes you want to see what you'd look like as an anime character or a 3D Pixar figure. Nothing wrong with that.
I've personally used AI photo transformation for all five of these. The one that surprised me the most was the personalized gifts angle. I turned a photo of my friend's dog into a Studio Ghibli style illustration, printed it on canvas, and gave it as a birthday present. She cried. Good tears. That's when I realized this technology isn't just a novelty. It has genuine emotional value.
How Image-to-Image AI Transformation Actually Works
Before diving into tools and techniques, it helps to understand what's happening under the hood. You don't need a computer science degree, but knowing the basics will make you dramatically better at controlling results.
When you generate ai from image using any modern tool, the process follows a general pattern. Your photo is first converted into a mathematical representation called a "latent" by an encoder. The AI then adds controlled noise to that latent, partially destroying the image information. The amount of noise added is determined by the denoise strength setting. A denoise of 0.3 means "keep most of the original image, just add some artistic flair." A denoise of 0.9 means "use the original loosely as a guide, but feel free to reimagine almost everything."
After adding noise, the AI's diffusion model steps through a denoising process, progressively cleaning up the noise while being guided by your text prompt. The text prompt tells the AI what style to apply during this reconstruction. So if your prompt says "oil painting in the style of Monet, soft impressionist brushstrokes," the AI will fill in the noisy gaps with those artistic characteristics.
The result is an image that blends the structure and composition of your original photo with the artistic style described in your prompt. It's essentially a collaboration between you (providing the photo and direction) and the AI (providing the artistic interpretation).
This is fundamentally different from traditional style transfer networks. Older neural style transfer tools simply overlaid texture patterns from a reference artwork. Modern diffusion-based approaches actually understand and re-render the scene. That's why 2026-era transformations look dramatically better than anything from even two years ago.
If you want to understand the broader landscape of AI image tools, I covered the major players in my comparison of the best AI image generators.
Best Tools for Turning Photos Into AI Art
I've tested dozens of tools for photo-to-AI transformation over the past year, and the options range from dead simple to incredibly powerful. The right tool depends on whether you value ease of use or creative control.
Stable Diffusion (ComfyUI or Automatic1111)
This is the heavyweight champion for photo transformation. Stable Diffusion's img2img pipeline gives you granular control over every aspect of the transformation. You choose the model checkpoint (which determines the artistic style), the denoise strength, the prompt, the number of steps, the sampler, and more.
I run most of my serious transformations through ComfyUI because I can build custom workflows that chain multiple operations. For example, I have a workflow that takes a portrait photo, applies face detection, transforms the body into an anime style while keeping the face recognizable using a separate ControlNet, and then upscales the result. That kind of pipeline is only possible with an open-source tool.
The tradeoff is complexity. If you've never used ComfyUI, there's a learning curve. But the results are worth it, and once you build a workflow, you can reuse it forever.
Best for: Power users who want maximum control and unlimited free generations Learning curve: Moderate to steep Cost: Free (requires a GPU with 6GB+ VRAM, or use a cloud platform)
Midjourney
Midjourney's /blend and image prompt features make it surprisingly good for photo transformation, even though it's primarily known for text-to-image generation. You upload your photo as a reference, add a style prompt, and Midjourney produces something that feels artistically complete.
The aesthetic quality of Midjourney transformations is hard to beat. The tool has an inherent sense of visual balance and color harmony that other generators don't quite match. When I turn photos into AI with Midjourney, the results look like they were created by a skilled digital artist, not a machine.
The downside is less control. You can't precisely tune how much of your original photo is preserved versus reimagined. Sometimes the AI takes too much liberty, and the result barely resembles your source image.
Best for: Users who want beautiful results without technical setup Learning curve: Low Cost: $10-30/month
Flux img2img
Flux has become my go-to for ai from image transformations when I need the result to look photorealistic rather than obviously artistic. If you want to change the setting of a photo, swap a background, or apply subtle style changes while maintaining realism, Flux handles this better than anything else I've tested.
I've been running Flux through Apatero for most of my photo transformation work because the cloud infrastructure handles the processing and I don't need to worry about VRAM limitations. For a deep dive on using tools like Flux for creative image work, check out my guide on creating AI images like a pro.
Best for: Realistic style changes and photo-to-photo transformation Learning curve: Low to moderate Cost: Free (open-source) or $8-20/month on hosted platforms
Mobile Apps (Lensa, Prisma, Dawn AI)
If you just want to turn a selfie into something fun without touching a computer, mobile apps have gotten genuinely good. Lensa's "Magic Avatars" feature popularized AI portraits in 2023, and the technology has only improved since then.
I tested about eight different mobile apps last month. The results are more limited than desktop tools, but the convenience factor is real. You snap a photo, pick a style, and get a transformed image in 30 seconds. For casual use, that's all most people need.
Best for: Quick casual transformations on mobile Learning curve: None Cost: Free with limits, $5-15 for premium features
Step-by-Step Guide to Transforming Your First Photo
Let me walk you through the actual process of turning a photo into AI art. I'll use the Stable Diffusion img2img approach since it gives you the most control and is completely free.
Step 1: Choose Your Source Photo
Not all photos transform equally well. After experimenting with hundreds of source images, I've found that certain qualities make a photo much better as a starting point.
Photos with clear subjects and good composition transform best. A well-framed portrait, a landscape with a strong focal point, or an object with clean lines will give the AI clear structural information to work with. Busy, cluttered photos with no clear subject tend to produce messy results because the AI doesn't know what to focus on.
That said, don't stress about photo quality. AI handles low-resolution sources surprisingly well. I've transformed blurry phone photos from 2015 into detailed artwork. The AI fills in detail during the transformation process, so minor blur and noise are actually cleaned up automatically.
For the best results, pick a photo that:
- Has a clear subject (person, animal, building, landscape)
- Has reasonable lighting (not completely dark or blown out)
- Has a composition you like (the AI preserves the general layout)
- Means something to you (the transformation will feel more rewarding)
Step 2: Select Your Target Style
This is where the creative fun begins. You need to decide what artistic style you want your photo transformed into. Here are the most popular options, along with the prompt language that works best for each.
Oil Painting: "oil painting, thick impasto brushstrokes, rich warm colors, museum quality, dramatic chiaroscuro lighting"
Watercolor: "watercolor painting, soft washes of color, visible paper texture, delicate transparent layers, wet on wet technique"
Free ComfyUI Workflows
Find free, open-source ComfyUI workflows for techniques in this article. Open source is strong.
Anime/Manga: "anime style, Studio Ghibli aesthetic, clean line art, vibrant colors, detailed background, cel shading"
3D Character (Pixar Style): "3D rendered character, Pixar animation style, subsurface scattering, soft lighting, detailed textures, cinematic quality"
Pencil Sketch: "detailed pencil drawing, graphite on paper, cross-hatching, fine line work, realistic shading"
Fantasy Art: "fantasy art illustration, epic composition, magical lighting, detailed environment, concept art quality"
Step 3: Configure Your Settings
Here's where most people go wrong. The settings matter enormously, and the defaults aren't always optimal for photo transformation.
Denoise Strength (most critical setting):
- 0.2-0.4: Subtle transformation. Your photo is clearly recognizable with light artistic styling. Good for enhancing photos while maintaining identity.
- 0.5-0.6: Moderate transformation. The composition is preserved but significant artistic changes are applied. Good balance for most use cases.
- 0.7-0.8: Heavy transformation. The AI takes major creative liberty. The result is "inspired by" your photo rather than a direct translation.
- 0.9-1.0: Near-complete reimagining. Only the vaguest composition hints remain. Often too extreme for most purposes.
I typically start at 0.55 for portraits and 0.65 for landscapes. Portraits need more structural preservation to remain recognizable, while landscapes can handle more artistic reinterpretation.
Steps: 25-30 steps is the sweet spot. Going higher doesn't meaningfully improve quality but slows generation.
CFG/Guidance Scale: 7-8 for most styles. Higher values (10-12) create more stylized results but risk artifacts.
Resolution: Match or slightly exceed your source photo's resolution. For best quality, I recommend generating at 1024x1024 or 1024x768 and then upscaling afterward. My guide on high-quality AI image generation covers upscaling workflows in detail.
Step 4: Generate and Iterate
Hit generate and see what you get. Here's an important mindset shift. Your first result probably won't be the final one. Treat it as a test run.
I usually generate four images at once and evaluate which direction I like best. Then I refine the prompt and settings based on what I see. Maybe the colors are too muted, so I add "vibrant, saturated colors" to the prompt. Maybe the style isn't strong enough, so I bump denoise from 0.5 to 0.65. This iterative process is normal and expected.
After 3-4 rounds of refinement, you'll typically have something you're genuinely happy with. Save the settings and prompt so you can reproduce the style on other photos later.
Step 5: Post-Process for Maximum Quality
The raw output from any AI tool usually benefits from a bit of finishing work. Upscaling to a higher resolution makes a huge difference if you plan to print the image or display it at full screen. Tools like SUPIR, Real-ESRGAN, and SeedVR2 specialize in AI-aware upscaling that enhances detail without creating artifacts.
I also run face restoration (CodeFormer) on any image containing faces. AI transformations sometimes produce subtle facial asymmetries or softness around eyes and teeth that CodeFormer corrects instantly.
For a complete breakdown of post-processing pipelines, see my guide to AI photo tools.
Popular Transformation Styles and How to Nail Them
Different transformation styles require different approaches. After running hundreds of tests across every style I could think of, here are the ones that work best and how to get the most out of each.
Want to skip the complexity? Apatero gives you professional AI results instantly with no technical setup required.
Turn Your Photo Into a 3D Character
This is probably the most requested transformation right now. People want to see themselves as Pixar or Disney characters. The technology has gotten good enough that the resemblance is genuinely uncanny.
The trick to great 3D character results is using a checkpoint model that specializes in 3D rendering. Standard photorealistic models struggle with the stylized proportions and surface shading that make 3D characters look right. I've gotten the best results using models like DreamShaper or Disney Pixar Cartoon Type A, combined with a denoise strength of 0.55-0.65.
For full-body shots, keep the denoise higher (0.65+) to allow the AI to reshape proportions into the characteristic 3D animation style. For headshots and portraits, keep it lower (0.5-0.55) to preserve facial features. Nobody wants a 3D avatar that doesn't look like them.
I tested this on a group of 20 people's photos last month as a fun experiment. The best results came from photos with clear, front-facing poses and good lighting. Profile shots and photos with heavy shadows produced less recognizable results. About 85% of participants said the 3D version was clearly recognizable as them, which is a pretty solid hit rate.
Anime and Manga Style
Anime transformation has been popular since the early days of AI art, and the quality has reached a point where the results look like they could be frames from actual anime series. The key is choosing the right model and prompt structure.
For Japanese anime style specifically, I use models like Anything V5 or CounterfeitXL. These are trained heavily on anime artwork and understand the conventions of the medium. Big eyes, simplified noses, specific hair rendering, and clean line art all emerge naturally.
Hot take: Most anime-transformed photos I see online are over-processed. People crank the denoise to 0.8+ and lose all resemblance to the original person. A denoise of 0.5-0.6 with a dedicated anime model produces results that are both stylistically convincing and recognizably you. That's the sweet spot, and almost nobody uses it because they want the most extreme transformation possible. Restraint is underrated.
Oil Painting and Classical Art
Transforming photos into oil paintings is one of the more subtle applications, and it's one that can produce genuinely gallery-worthy results. The best outputs from this style are indistinguishable from actual digital paintings. I've printed several for my office, and visitors have asked who the artist is.
The secret is layering your prompt with specific painting terminology. Don't just say "oil painting." Say "oil painting, visible brushstrokes, rich impasto technique, warm color palette, classical portrait lighting, gallery quality, museum exhibition piece." Each specific term guides the AI toward a more coherent and intentional result.
Landscapes work exceptionally well in oil painting style. Something about the way the AI handles natural scenery with painterly techniques creates images that feel timeless and contemplative. I converted a casual sunset photo I took at the beach last year into an oil painting style, and it's now a 24x36 canvas print hanging in my living room.
Watercolor and Illustration
Watercolor is tricky because the AI can easily produce results that look like a digital watercolor filter rather than a genuine watercolor painting. The difference comes down to prompt specificity and model choice.
Real watercolor paintings have visible paper texture, areas of transparent wash where the white paper shows through, and a characteristic way that colors bleed and blend at edges. When your prompt includes these specific details, the AI captures them authentically instead of just applying a generic soft color wash.
I've found that reducing the CFG/guidance scale to 5-6 (lower than usual) helps with watercolor results. It allows the AI more freedom in how it interprets colors and edges, which aligns with the organic, unpredictable nature of actual watercolor painting.
Common Mistakes and How to Avoid Them
I've made every mistake possible when transforming photos with AI. Here are the ones that trip up most people, along with the fixes that I wish someone had told me earlier.
Mistake 1: Denoise Too High
This is the number one problem. People set denoise to 0.8 or higher because they want a dramatic transformation, and they end up with an image that has nothing to do with their original photo. The composition, the subject, even the basic layout can change completely at high denoise values. Start low (0.4-0.5) and increase gradually.
Mistake 2: Vague Prompts
"Make it look cool" is not a useful prompt. The AI needs specific direction about style, medium, lighting, and mood. The more precise you are about what you want, the better the result. Think of the prompt as a creative brief for a human artist. Would an artist know what to do with "make it look cool"? Probably not.
Earn Up To $1,250+/Month Creating Content
Join our exclusive creator affiliate program. Get paid per viral video based on performance. Create content in your style with full creative freedom.
Mistake 3: Wrong Aspect Ratio
If your source photo is 16:9 landscape and you generate at 1:1 square, the AI will either crop aggressively or stretch unnaturally. Always match your generation resolution's aspect ratio to your source photo's aspect ratio. This sounds basic, but I've seen countless people post distorted transformations because they ignored this.
Mistake 4: Ignoring ControlNet
ControlNet is like giving the AI a structural blueprint of your photo. It extracts edge maps, depth maps, or pose information and uses them to constrain the transformation. Without ControlNet, the AI only has a noisy latent to work with. With ControlNet, it has precise structural guidance.
For portraits, I always use ControlNet with either OpenPose (for body positioning) or Canny (for edge preservation). The results are dramatically more consistent and recognizable. If you're not using ControlNet for photo transformations, you're making the process harder than it needs to be.
Mistake 5: Not Iterating
Hot take: The biggest difference between people who get great results from AI photo transformation and people who think the technology "doesn't work" is iteration. The people who get amazing results generate 10, 20, sometimes 50 variations before finding the one that clicks. The people who are disappointed generated one image, didn't love it, and gave up.
AI art generation is inherently stochastic. Each generation produces different results, even with identical settings. That randomness is a feature, not a bug. It means the perfect version of your transformation exists. You just need to generate enough times to find it.
Advanced Techniques for Better Results
Once you've mastered the basics, there are several techniques that can push your transformations from good to exceptional.
Multi-Step Transformation
Instead of going directly from a photo to a dramatically different style in one step, use multiple passes with progressively increasing denoise values. First pass at 0.3 to establish the basic style direction. Second pass at 0.5 using the first result as the new input. This gradual approach produces more coherent results because each step makes modest changes that build on each other.
I discovered this technique accidentally when I forgot to change my denoise setting between two runs. The second pass produced noticeably better results than going directly to the higher denoise value. Now it's a standard part of my workflow.
IP-Adapter for Style Consistency
IP-Adapter lets you feed in a reference image that defines the artistic style, separate from the text prompt. Want your photo to look like a specific painting or illustration? Load that artwork as the IP-Adapter reference and your photo as the img2img input. The AI will extract the style from the reference and apply it to your image.
This is incredibly powerful for creating consistent series. Transform ten different photos into the same artistic style by using the same reference image. The results maintain visual coherence that would be impossible to achieve with text prompts alone.
Inpainting for Selective Transformation
Sometimes you want to transform part of an image while leaving the rest untouched. Inpainting lets you mask specific areas for transformation. Keep the face photorealistic but turn the background into a painting. Keep the landscape unchanged but transform the sky into a dramatic sunset. The selective control adds another dimension to creative possibilities.
I use this extensively when creating ai from images for professional projects. A client might want their product photo placed in a fantastical environment. Rather than transforming the whole image, I mask around the product and only generate the background and surrounding elements.
Real-World Uses I've Actually Tested
Theory is useful, but I want to share some specific use cases where I've successfully applied photo-to-AI transformation in real-world contexts.
Custom Wall Art
I mentioned the oil painting beach sunset earlier. Since then, I've created about 15 pieces of custom wall art from my own photos. The process works particularly well because every piece has personal meaning, as it started as a moment I actually experienced, but the artistic transformation makes it visually striking enough to display.
The cost breakdown is compelling. A custom commission from a human artist for a similar quality digital painting would cost $200-500. AI transformation costs effectively nothing (or a few cents on a hosted platform), plus $30-60 for a quality canvas print. You get personalized, meaningful art for a fraction of the price.
Social Media Content
Running a small business account, I've tested posting regular photos versus AI-transformed versions of the same photos. The transformed images consistently get 40-60% higher engagement. People stop scrolling when they see something visually unusual, and AI-transformed photos hit that sweet spot of being interesting enough to pause on without being so abstract that the subject is unrecognizable.
Creative Portfolios
Photographers and artists can create entirely new portfolio pieces by transforming their existing work into different styles. A wedding photographer's best shots reimagined as watercolor illustrations. A landscape photographer's portfolio rendered as classical oil paintings. It's not replacing the original work. It's extending it into new creative territory.
Turning Photos to AI for Product Visualization
E-commerce sellers can transform basic product photos into stylized lifestyle imagery. A plain product shot on a white background can be placed into a cozy living room setting, a professional studio environment, or an outdoor scene. This creates engaging visual variety without expensive photoshoots.
Understanding the Ethics and Limitations
I want to address something that the hype-driven AI content tends to skip over. There are real ethical considerations when you turn photos into AI art, especially when those photos include other people.
Transforming your own photos is straightforward. Those are yours, and you have every right to run them through AI tools. But transforming photos of other people, especially in ways that significantly alter their appearance, enters grayer territory. I recommend always getting permission before transforming and sharing photos of friends, family, or anyone else. It's both an ethical best practice and a good way to avoid awkward conversations later.
There's also the question of how these tools relate to the broader art community. Some artists feel that AI transformation of photos devalues their craft. I disagree, but I think the concern deserves respect. Using AI to create art from your photos doesn't diminish the skill of human artists any more than digital cameras diminished the skill of film photographers. They're different tools that coexist in a creative ecosystem.
Hot take: People who use AI photo transformation tools regularly actually develop a better eye for composition, color theory, and artistic style. The iterative process of trying different styles and evaluating results is a form of visual education. I've noticed my own photography improving because I think about composition more intentionally, knowing that a well-composed photo transforms better. The tools make you more visually literate, not less.
Getting the Best Results With Minimal Effort
Not everyone wants to install ComfyUI and learn about ControlNet. If you want great results with minimal technical investment, here's my streamlined recommendation.
Start with a hosted platform like Apatero that provides pre-built workflows for common transformations. Upload your photo, select a style preset, adjust the transformation strength slider, and generate. This approach handles 80% of use cases perfectly well. You can explore the technical depth later if you're interested, but you don't need it to get started.
For mobile-only users, Lensa and Prisma are the current leaders. They're limited compared to desktop tools, but the results are solid for social sharing and personal enjoyment. If you want something between mobile simplicity and full ComfyUI power, web-based tools strike a good balance.
The technology will only get better. Models are improving rapidly, interfaces are getting simpler, and costs are dropping. If you've been curious about turning your photos into AI art, there's never been a better time to start experimenting. Even your most mundane snapshots might surprise you once they've been transformed.
For more in-depth guidance on the photo tools available for transformation and enhancement, explore my complete guide to AI photo tools.
Frequently Asked Questions
Is it free to turn photos into AI art?
Yes, completely free options exist. Stable Diffusion can be run locally on any computer with a decent GPU (6GB+ VRAM) and provides unlimited, free photo transformations. Several web-based platforms also offer free tiers with limited monthly generations. Mobile apps like Prisma offer free basic transformations with premium features behind a paywall. If you're willing to invest a bit of time in setup, you never need to pay for AI photo transformation.
What photo formats work best for AI transformation?
PNG and JPEG both work well as source formats. PNG is slightly preferred because it preserves more detail without compression artifacts, but the practical difference is minimal for most transformations. The more important factor is resolution. Higher resolution source photos give the AI more information to work with. I recommend using photos that are at least 1024 pixels on their shortest side. Photos from modern smartphones (12+ megapixels) are more than sufficient.
Can I turn photos into AI commercially?
This depends on the tool and model you use. Open-source models like Stable Diffusion and Flux generally permit commercial use of generated images. Midjourney allows commercial use on paid plans. Always check the specific license terms of the model and platform you're using. If the source photo isn't yours, you'll also need to consider copyright of the original image. For commercial work, stick to your own photos or properly licensed stock images.
How do I keep faces recognizable after transformation?
Use a lower denoise strength (0.4-0.55) for portraits. Enable ControlNet with a face-focused preprocessor like OpenPose or MediaPipe Face Mesh. Run CodeFormer face restoration on the output if needed. The combination of controlled denoise and ControlNet guidance keeps facial features identifiable even with significant style changes. For the highest facial fidelity, look into tools like IP-Adapter FaceID, which specifically extracts and preserves facial identity during transformation.
What's the difference between style transfer and img2img?
Traditional style transfer uses a neural network to extract texture patterns from a reference artwork and overlay them onto your photo. The results look like your photo with a painted texture applied on top. Img2img (image-to-image) transformation is more fundamental. It partially destroys your photo's information and rebuilds it using a diffusion model guided by your style prompt. The result is a new image that genuinely looks like it was created in the target style, not a filter applied to a photo. Img2img produces dramatically better results for most applications.
Can I transform old or low-quality photos?
Absolutely. AI transformation works surprisingly well on old, low-resolution, or slightly damaged photos. The transformation process inherently adds detail and quality because the AI generates new visual information during reconstruction. I've transformed photos from the early 2000s taken on 2-megapixel cameras into detailed artwork. The AI fills in resolution and detail that wasn't in the original. For severely damaged photos, consider running an AI restoration tool first, then applying the style transformation as a second step.
How long does each transformation take?
Generation time depends on your hardware and the tool you're using. On a modern GPU (RTX 3060 or better), a single transformation takes 5-15 seconds with Stable Diffusion. Cloud-hosted platforms typically complete generations in 10-30 seconds, depending on server load. Mobile apps are usually under 30 seconds. Midjourney takes about 60 seconds per image. The actual creative time, including iteration, selecting your favorite result, and post-processing, is usually 5-15 minutes per final image.
What resolution should I generate at?
Generate at or near the model's native resolution for best quality. For most Stable Diffusion models, that's 1024x1024 or 1024x768. For Flux, 1024x1024 works well. Generating at higher resolutions can cause artifacts and compositional issues. Instead, generate at native resolution and then upscale the result using a dedicated AI upscaler like SUPIR or Real-ESRGAN. This two-step approach consistently produces better results than trying to generate at high resolution directly.
Can I batch-process multiple photos in the same style?
Yes. ComfyUI supports batch processing natively. You can feed in a folder of photos and have them all transformed with identical settings and prompts. This is perfect for creating consistent sets of images, like transforming an entire vacation album into watercolor illustrations or converting a series of product photos into stylized artwork. I regularly batch-process 20-50 images when creating content for Apatero projects.
Will AI transformation work on photos with multiple people?
Yes, but results are more variable. Photos with 1-2 people produce the most consistent transformations. Group photos (5+ people) can sometimes result in facial features blending between subjects, especially at higher denoise values. For group photos, I recommend keeping denoise at 0.4-0.5 and using ControlNet with OpenPose to maintain each person's distinct posture and positioning. If individual likeness matters, consider transforming each person separately and compositing the results.
Make AI images and video in your browser
Characters, video, photo packs. No GPU, no setup. Your first generation is free.
Related Articles

10 Best AI Influencer Generator Tools Compared (2025)
Comprehensive comparison of the top AI influencer generator tools in 2025. Features, pricing, quality, and best use cases for each platform reviewed.

5 Proven AI Influencer Niches That Actually Make Money in 2025
Discover the most profitable niches for AI influencers in 2025. Real data on monetization potential, audience engagement, and growth strategies for virtual content creators.

AI Action Figure Generator: How to Create Your Own Viral Toy Box Portrait in 2026
Complete guide to the AI action figure generator trend. Learn how to turn yourself into a collectible figure in blister pack packaging using ChatGPT, Flux, and more.