High Quality AI Image Generation: How to Create Professional-Grade Visuals Every Time
Master high quality AI image generation. Learn the techniques, settings, and workflows that produce print-ready, professional-grade visual content.
Make AI images and video in your browser
Characters, video, photo packs. No GPU, no setup. Your first generation is free.
There's a massive gap between a "cool AI image" and a "professional AI image." I see it every day. Someone generates a decent 1024x1024 image, posts it at that resolution, and wonders why it looks blurry and amateurish compared to the stunning examples they see online.
The secret? Those impressive examples aren't just generated and posted. They go through a quality pipeline. Optimal generation settings, AI upscaling, face enhancement, color grading, and careful post-processing. The raw generation is maybe 60% of the final quality. The other 40% comes from knowing how to finish the image properly.
I've spent two years refining my quality pipeline, and I'm going to share every detail of it here. No gatekeeping. These techniques work with any generation tool and can transform mediocre outputs into genuinely professional results.
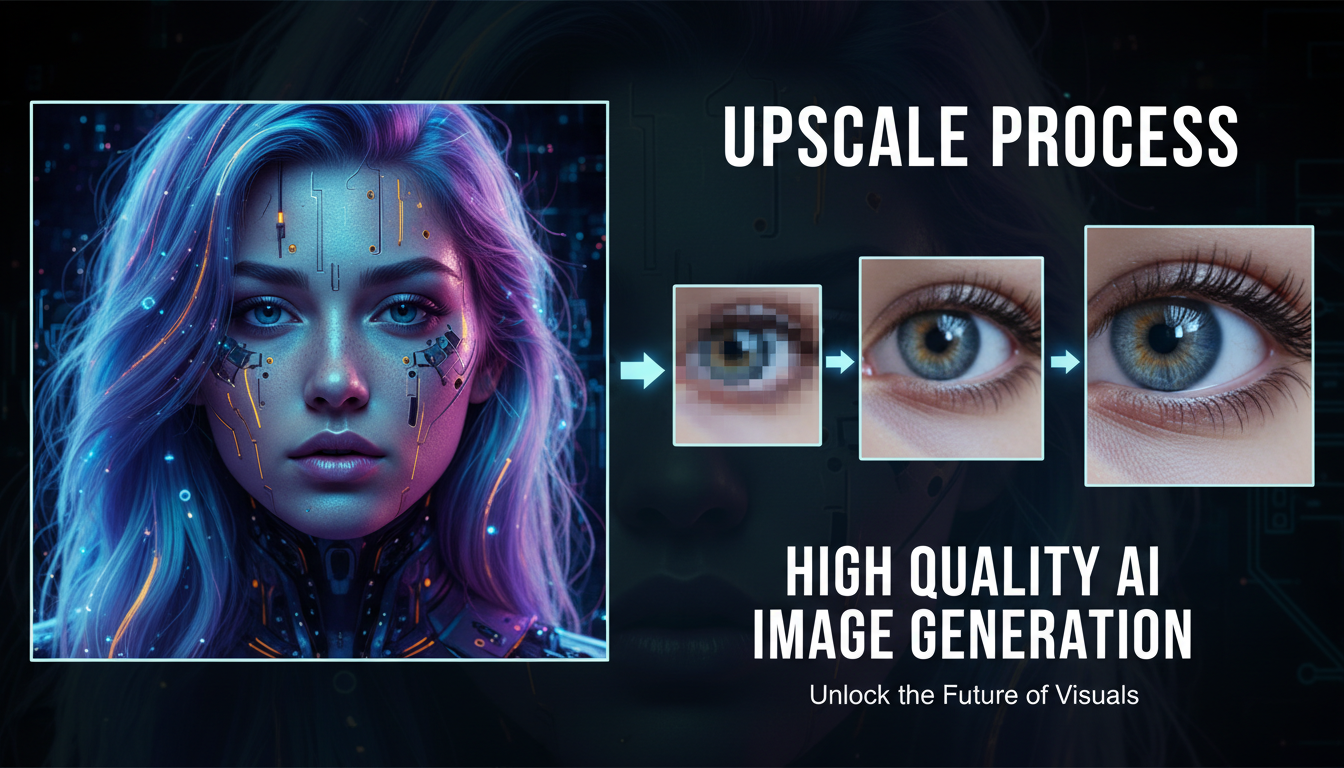
Quick Answer: Professional-quality AI images require three things. First, generate at optimal settings (correct resolution, adequate steps, appropriate guidance scale). Second, upscale with a dedicated AI upscaler like SUPIR or SeedVR2. Third, apply post-processing (face restoration, color correction, sharpening). This pipeline consistently produces print-ready images at 4K+ resolution.
- Always generate at the model's native resolution, then upscale
- SUPIR and SeedVR2 are the best upscalers for AI-generated images
- Face restoration (CodeFormer/GFPGAN) fixes the most common quality issue
- 30-40 generation steps is the sweet spot for most models
- Post-processing adds 40% of the perceived quality
Why Most AI Images Look Low Quality
Let me diagnose the most common quality issues I see, because understanding the problems helps you avoid them.
Wrong generation resolution. Every model has a native resolution it was trained at. Generating outside that range produces artifacts. SDXL works best at 1024x1024. Flux 2 at 1024x1024 or 1280x768. Force either to generate at 2048x2048 directly and you'll get duplicated features, weird proportions, and general weirdness.
Too few steps. Generation steps determine how much the model refines the image. At 10 steps, you get rough outlines with blurry details. At 20 steps, acceptable quality. At 30-40 steps, optimal quality. Beyond 50, diminishing returns. I see beginners generating at 15 steps because it's faster, then complaining about blurry results.
No upscaling. A 1024x1024 image looks fine on your phone but terrible on a 4K monitor or in print. AI upscaling doesn't just enlarge. It adds genuine detail that the original generation didn't capture. This single step transforms output quality more than any other.
Ignoring face quality. The human eye is incredibly sensitive to facial irregularities. A tiny distortion in a hand goes unnoticed. The same distortion on a face looks horrifying. Dedicated face enhancement catches and fixes these issues automatically.
Wrong CFG/guidance scale. Too low (under 5) and images look washed out and unfocused. Too high (over 12) and images look over-saturated and artificial. The sweet spot is 7-9 for most models, but it varies.
The Optimal Generation Settings for Maximum Quality
Here are my battle-tested settings for each major model. These produce the best raw quality before any post-processing.
Flux 2 Settings
- Resolution: 1024x1024 or 1280x768
- Steps: 25-30
- Guidance scale: 3.5-4.0 (Flux uses lower CFG than SD)
- Scheduler: Euler
- Denoise: 1.0 for text-to-image
Stable Diffusion SDXL Settings
- Resolution: 1024x1024 or 1280x768
- Steps: 30-40
- Guidance scale: 7-8
- Scheduler: DPM++ 2M Karras
- Denoise: 1.0 for text-to-image
Midjourney Settings
- Quality: --q 2 (high quality mode)
- Stylize: --s 100-250 (higher = more artistic, lower = more accurate)
- Resolution: Use --ar to set aspect ratio, Midjourney handles resolution
I covered model-specific optimization in more detail in my guide to AI image generation tools.
The Post-Processing Pipeline That Makes Everything Look Professional
This is where the real quality transformation happens. I run this pipeline on every image I intend to publish or deliver to a client.
Step 1: Face Restoration
Tool: CodeFormer (weight 0.5-0.7) or GFPGAN (weight 0.8)
Even well-generated faces benefit from restoration. CodeFormer enhances facial detail, fixes subtle asymmetries, and sharpens features while maintaining natural appearance. I run it at a lower weight (0.5) for images where the face already looks good, and higher weight (0.7) when there are visible issues.
The difference is subtle but impactful. Side by side, the restored face looks sharper, more detailed, and more natural. It's the kind of improvement that viewers notice subconsciously even if they can't articulate what's better.
Step 2: AI Upscaling
Tool: SUPIR (best quality) or Real-ESRGAN (fastest)
This is the most impactful step. I typically upscale 2x (1024 to 2048) or 4x (1024 to 4096). SUPIR adds remarkable detail during upscaling. Skin pores, fabric weave, material textures. It's not just making pixels bigger. It's inferring and adding detail that was implied by the original generation but not explicitly rendered.
SUPIR settings I use:
Free ComfyUI Workflows
Find free, open-source ComfyUI workflows for techniques in this article. Open source is strong.
- Scale: 2x or 4x
- Denoise strength: 0.3-0.5 (higher adds more detail but may alter the image)
- Steps: 20-30
When to use Real-ESRGAN instead: Batch processing, quick tasks, or when SUPIR's inference time is too long. Real-ESRGAN is 10x faster and produces good (not great) results.
I compared these upscalers extensively in my testing. SUPIR wins on quality by a visible margin, but takes 30-60 seconds per image. Real-ESRGAN takes 2-3 seconds. For my blog images, I use SUPIR. For batch processing hundreds of images, Real-ESRGAN.
Step 3: Color Correction and Grading
Tool: Photoshop, Lightroom, or GIMP
AI generations often have slightly off color balance. Skin tones lean too warm or too cool. Shadows are crushed or highlights are blown. A quick levels and curves adjustment fixes these issues in under a minute.
My standard adjustments:
- Pull highlights down slightly (AI tends to over-brighten)
- Add a tiny amount of contrast (5-10%)
- Adjust white balance if skin tones look off
- Add subtle vignette for compositional focus
Step 4: Sharpening
Tool: Unsharp Mask in any image editor
After upscaling, a light sharpening pass (radius 1.0, amount 30-50%) adds crispness. Don't over-sharpen. That looks worse than no sharpening at all. The goal is to counteract any softness introduced by the upscaling process.
Step 5: Format and Export
Export as:
Want to skip the complexity? Apatero gives you professional AI results instantly with no technical setup required.
- PNG for maximum quality (web use)
- JPEG at 90-95% quality for social media (smaller file size)
- TIFF for print production
Making Your Phone Photos Look Professional Quality
Not everything starts with AI generation. Many people want to enhance their existing photos to professional quality. The same pipeline applies, with some modifications.
For Phone Photos
- Denoise with a dedicated denoiser (most phone photos have noise, especially in low light)
- Upscale with SUPIR from phone resolution (typically 3024x4032) to 6048x8064 or higher
- Enhance faces with CodeFormer if the photo includes people
- Color correct to compensate for phone camera's auto processing
The quality improvement is dramatic. Phone photos that looked "okay" become genuinely impressive after this treatment. I've printed phone photos at poster size after running them through this pipeline, and the results hold up surprisingly well.
For Old or Low-Resolution Photos
- Start with face restoration if the photo includes people
- Upscale aggressively (4x or even 8x for very low resolution originals)
- Denoise to remove compression artifacts
- Color correct for fading and color shift
- Sharpen to recover edge detail
I've restored photos from the early 2000s (640x480 resolution) to prints that look acceptable at 8x10 inches. Not perfect, but far better than the originals.
What Makes a "High Quality" AI Image?
Let me define what quality actually means in concrete terms.
Resolution. For web use, 2048x2048 or higher. For print, 300 DPI at your target size (an 8x10 print needs 2400x3000 pixels minimum).
Detail. Textures should be visible and realistic. Skin pores, fabric weave, surface imperfections. Over-smooth textures scream "AI generated."
Color accuracy. Natural-looking color palette without over-saturation or impossible lighting.
Anatomical correctness. Proper proportions, correct number of fingers, realistic body mechanics.
Earn Up To $1,250+/Month Creating Content
Join our exclusive creator affiliate program. Get paid per viral video based on performance. Create content in your style with full creative freedom.
Composition. Following photography principles (rule of thirds, leading lines, depth of field) even in generated images.
Consistency. No random artifacts, distortions, or impossible physics.
The best way to evaluate quality is to compare your images to professional photography in the same genre. If your AI-generated product shot looks like it could have come from a professional studio, you've hit the quality bar.
Quality Comparison Across Tools
I ran the same prompt through multiple tools with optimized settings, then applied my standard post-processing pipeline. Here's how they ranked for final output quality.
| Tool + Post-Processing | Quality Score | Time per Image | Cost per Image |
|---|---|---|---|
| Flux 2 + SUPIR | 9.5/10 | 90 seconds | Free (local) |
| Midjourney + SUPIR | 9.5/10 | 120 seconds | $0.15-0.30 |
| SDXL + Quality LoRAs + SUPIR | 9.0/10 | 90 seconds | Free (local) |
| DALL-E 3 + SUPIR | 8.0/10 | 60 seconds | $0.10-0.20 |
| Leonardo AI + SUPIR | 8.0/10 | 75 seconds | Free-$0.10 |
The insight here is clear. The upscaling step (SUPIR) matters more than the generation tool for final quality. A mediocre generation upscaled well often looks better than a great generation at native resolution.
Frequently Asked Questions
What resolution should I generate AI images at?
Always generate at the model's native resolution (usually 1024x1024). Then upscale to your target resolution. Direct generation at non-native resolutions causes artifacts.
How do I make AI images look less "AI-generated"?
Three things help most. Add subtle imperfections (grain, vignette, slight blur). Use photographic prompts (specific camera and lens references). Apply post-processing that mimics real photography workflows. My text to image AI guide covers prompt writing techniques that produce more natural-looking results from the start.
What's the best upscaler for AI images?
SUPIR for maximum quality. Real-ESRGAN for speed. SeedVR2 for a balance of both. All three are free and run in ComfyUI.
Can AI images be printed at large sizes?
Yes, with proper upscaling. A standard generation upscaled 4x reaches about 4096x4096 pixels. At 300 DPI, that's a 13.6-inch print. For larger formats, upscale 8x or generate tile-based compositions.
How many steps should I use for generation?
25-40 steps for most models. Fewer than 20 produces noticeably lower quality. More than 50 wastes time without visible improvement. The optimal range varies by model and scheduler.
Does the CFG/guidance scale affect quality?
Yes, significantly. Too low (under 5) produces washed-out, unfocused images. Too high (over 12) creates oversaturated, artificial-looking results. Most models work best at 7-9.
How do I fix blurry AI images?
First, check your generation settings (sufficient steps, correct resolution). If the generation looks good but lacks detail, apply AI upscaling. For soft focus issues, try a different scheduler or increase the guidance scale slightly.
Is there a one-click solution for professional quality?
Topaz Photo AI comes closest. Upload, click enhance, and get good results. For AI-generated images specifically, building a ComfyUI workflow with generation, restoration, and upscaling chained together is a one-click solution once set up. Platforms like Apatero offer similar convenience without local setup.
What's the difference between upscaling and super-resolution?
Functionally similar. Both increase resolution while adding detail. "Super-resolution" typically refers to AI-based approaches that infer new detail, while "upscaling" sometimes refers to simpler interpolation. In practice, modern upscaling tools all use AI and the terms are interchangeable.
How do professional photographers use AI image tools?
Most use AI for post-processing. Upscaling, background replacement, object removal, and style matching. Some use AI generation for concept development and client previews. The workflow typically combines traditional photography with AI enhancement in post-production.
The Quality Mindset
Here's the mindset shift that improved my output quality more than any technical change. Stop treating generation as the end of the process. It's the beginning.
Every image I publish goes through my full pipeline. Even images that look great straight out of generation get upscaled and lightly post-processed. The consistency of this approach means everything I produce hits a minimum quality standard.
The time investment is minimal. An extra 2-3 minutes per image for a dramatic quality improvement. Once you've set up the pipeline (which takes about an hour), running images through it becomes automatic.
Professional quality isn't about having the best generation model. It's about having a reliable process that elevates every output to a publishable standard. Build that process, and every tool you use produces professional results. For a comprehensive look at the entire AI image creation pipeline, from generation through post-processing, my complete guide to AI pictures ties all of these quality techniques together in one place.
Make AI images and video in your browser
Characters, video, photo packs. No GPU, no setup. Your first generation is free.
Related Articles

10 Best AI Influencer Generator Tools Compared (2025)
Comprehensive comparison of the top AI influencer generator tools in 2025. Features, pricing, quality, and best use cases for each platform reviewed.

5 Proven AI Influencer Niches That Actually Make Money in 2025
Discover the most profitable niches for AI influencers in 2025. Real data on monetization potential, audience engagement, and growth strategies for virtual content creators.

AI Action Figure Generator: How to Create Your Own Viral Toy Box Portrait in 2026
Complete guide to the AI action figure generator trend. Learn how to turn yourself into a collectible figure in blister pack packaging using ChatGPT, Flux, and more.