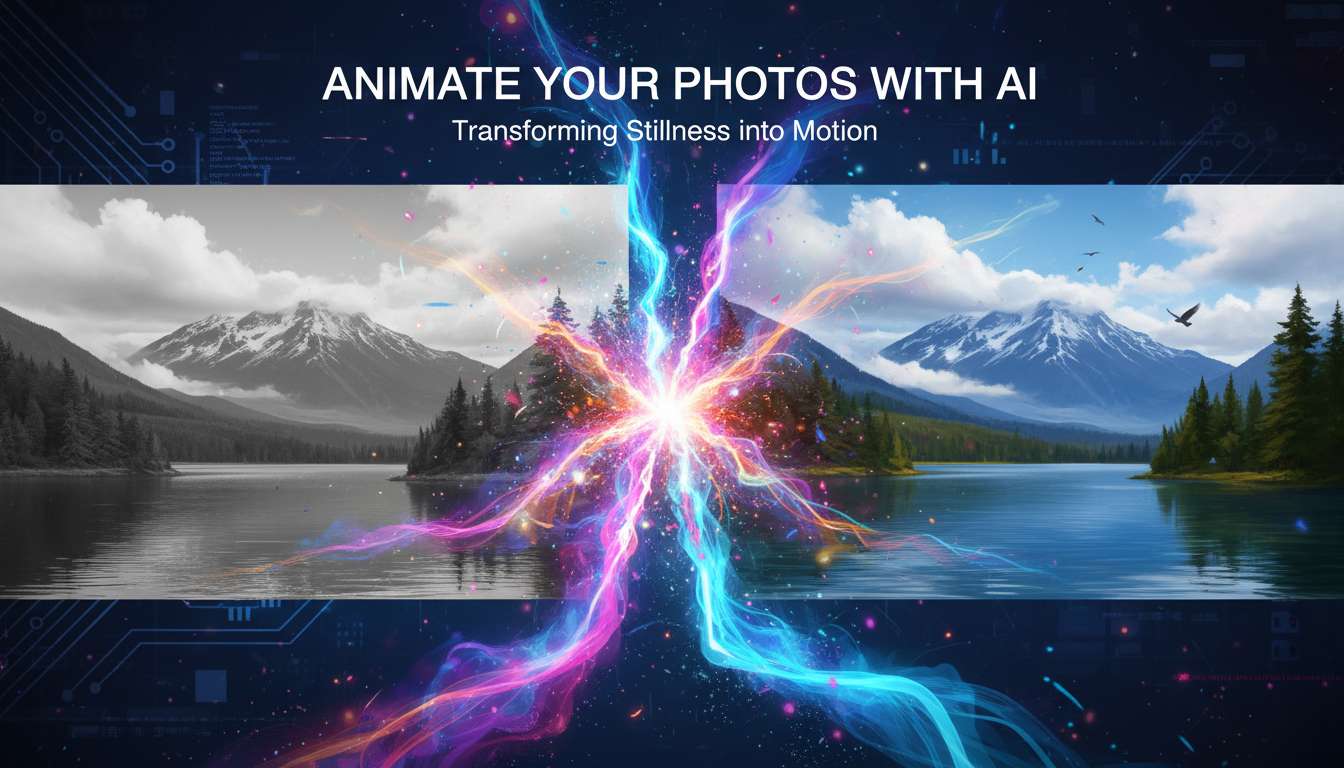
How to Animate Photos with AI: Bring Still Images to Life
Learn how to animate photos with AI tools. Turn still images into dynamic videos, cinemagraphs, and animated content with step-by-step instructions.
Make AI images and video in your browser
Characters, video, photo packs. No GPU, no setup. Your first generation is free.
I still remember the first time I managed to animate a photo of my dog sitting on the porch. One moment it was a static JPEG. The next, her ears were flicking in a gentle breeze and her tail was wagging, and the whole scene felt alive. My wife walked by, glanced at my screen, and said, "When did you take that video?" I hadn't. It was a single photograph, brought to life by AI in about 30 seconds.
That was early 2025, and the technology has improved dramatically since then. The ability to animate photos with AI has gone from a party trick to a genuinely useful creative tool. Social media managers use it to make product shots more engaging. Family photographers turn heritage portraits into moving memories. Filmmakers create pre-visualization footage from concept art. And hobbyists like me just think it's incredibly fun.
Quick Answer: The best way to animate photos in 2026 is to use an AI image-to-video tool like Runway Gen-3, Kling 2.0, or WAN 2.2 (open source). Upload your still image, write a short prompt describing the motion you want, and the AI generates a 3-10 second animated clip. For advanced workflows, Apatero provides cloud-based ComfyUI pipelines that handle photo animation without requiring a local GPU.
- AI can animate any still photo into a realistic video clip, cinemagraph, or parallax effect
- Commercial tools like Runway and Kling are easiest. Open-source WAN 2.2 produces the best quality
- Results depend heavily on the source image quality and your text prompt
- Cinemagraphs (partial animation) are the most reliable and professional-looking output
- You do not need video editing experience. The AI handles motion synthesis automatically
What Does It Mean to Animate Photos with AI?
When we talk about animating photos with AI, we are describing the process of feeding a single still image into a machine learning model and getting back a short video where elements of that image appear to move naturally. The AI does not simply zoom or pan across the image like the old Ken Burns effect. It actually synthesizes new frames, predicting how the scene would look if time were passing.
The underlying technology draws on diffusion models trained on millions of video clips. These models have learned the physics of motion: how water flows, how fabric drapes, how a person shifts their weight, how clouds drift across a sky. When you provide a photograph and a motion prompt, the model applies those learned motion patterns to your specific composition.
I want to be clear about what this is and what it is not. You are not creating a Hollywood movie from a single photo. You are generating 3 to 10 seconds of believable movement that starts from your original image. For social media content, product showcases, artistic projects, and personal memories, that is more than enough. For anything longer or more complex, you will want to explore full video generation from images, which takes a different approach.
The quality ceiling has risen significantly since late 2025. Modern models preserve the subject's identity, maintain consistent lighting, and produce motion that respects the laws of physics most of the time. I say "most of the time" because there are still failure modes. Hands remain tricky. Complex interactions between multiple subjects can get messy. But for single-subject animation or environmental effects, the results are genuinely impressive.
What Types of Photo Animation Can AI Create?
Not all animation is created equal. Depending on your goal and your source image, you will want to choose different animation approaches. Understanding these categories will save you hours of frustration and help you pick the right tool for the job.
Full Video Animation
This is the most dramatic type. The AI takes your entire photo and sets everything in motion. A portrait becomes a person speaking or turning their head. A landscape becomes a scene with wind, water, and moving clouds. A product shot becomes a 360-degree showcase.
Full video animation produces the most impressive results, but it also carries the highest risk of artifacts. I have found that images with a clear focal subject and a relatively simple background work best. A portrait against a plain wall will animate beautifully. A group photo at a busy market will often produce strange warping.
Cinemagraphs
This is honestly my favorite type of photo animation, and I think it is the most underrated. A cinemagraph freezes most of the image while animating only a specific element. Think of a coffee shop photo where the steam rises from a cup but everything else is perfectly still. Or a landscape where the waterfall flows but the rocks and trees are frozen.
Cinemagraphs look incredibly polished because the static portions maintain perfect quality while the animated element draws the eye. They are extremely popular on Instagram and Pinterest, and they loop seamlessly, making them ideal for social media. Tools like Plotagraph and Flixel have specialized in this for years, but AI models can now create them more naturally.
Parallax and 3D Photo Effects
Parallax animation creates the illusion of depth by separating foreground and background layers and moving them at different speeds. Facebook's 3D Photo feature used this technique, and AI has taken it to another level. Modern tools can estimate depth maps from flat images and create convincing parallax motion automatically.
I tested this extensively with travel photos last month. The results were stunning with architectural shots and cityscapes, where the depth layers are obvious. They were less convincing with close-up portraits, where the depth separation is more subtle.
Lip Sync and Talking Head Animation
This specialized category takes a portrait photo and makes the person appear to speak, synced to an audio track. Tools like SadTalker, Wav2Lip, and newer commercial options can create surprisingly convincing talking head videos from a single photo. It is widely used for creating training videos, social media content, and personalized messages.
Hot take: Lip sync animation from photos has become so convincing that it is genuinely concerning from a misinformation standpoint. I have seen demos that would fool most casual viewers. The technology is useful, but it needs to be used responsibly. Always disclose when you have created AI-animated content of real people.
What Are the Best Tools to Animate Photos in 2026?
I have spent the last several months testing every major photo animation tool I could find. Some are commercial platforms with slick interfaces. Others are open-source models you can run locally or through cloud services. Here is my honest assessment of the current landscape.
Runway Gen-3 Alpha Turbo
Runway remains the most approachable tool for beginners who want to animate photos. The web interface is intuitive, the results are consistent, and the generation speed is fast. You upload your image, type a motion prompt, and get results in about 30 seconds.
Where Runway excels is in its motion brush feature, which lets you paint specific areas of the image where you want motion to occur. This makes cinemagraph creation trivially easy. Just paint the water, the smoke, or the hair, and leave the rest untouched.
The downside is cost. Runway uses a credit system, and at roughly $0.05 per second of video, costs add up quickly if you are iterating on prompts. For professional use, the subscription plans make sense. For casual experimentation, you can burn through a free trial in an afternoon.
My rating: 8/10 for ease of use, 7/10 for quality, 5/10 for value.
Kling 2.0 by Kuaishou
Kling surprised me. This Chinese AI video platform has been quietly iterating, and version 2.0 produces some of the most natural character animation I have seen from a photo. If your source image contains a person, Kling's output often looks more natural than Runway's, particularly for facial expressions and body movement.
The web interface has improved significantly and now supports English well. Generation takes slightly longer than Runway, but the quality trade-off is worth it for character-centric animation. I animated a photo of a street musician, and the result looked like it was pulled from a documentary. The subtle hand movements and head tilts were remarkably realistic.
The free tier is generous enough to test properly, which I appreciate. Not every platform gives you enough credits to actually evaluate the tool before committing.
My rating: 7/10 for ease of use, 9/10 for character animation quality, 7/10 for value.
WAN 2.2 (Open Source)
If you are comfortable with a more technical setup, WAN 2.2 from Alibaba's Tongyi Lab produces the highest quality photo animation available right now. Period. The image-to-video mode accepts any photograph and generates motion that is consistently more coherent and detailed than the commercial alternatives.
The catch is accessibility. Running WAN 2.2 locally requires a GPU with at least 12GB of VRAM, ideally 24GB. Most people do not have that sitting on their desk. This is where cloud solutions come in. Platforms like Apatero offer ComfyUI workflows that run WAN 2.2 in the cloud, so you get the open-source quality without needing to build a workstation. I wrote a detailed guide on WAN 2.2 with ComfyUI if you want to dive deeper into the setup.
My rating: 5/10 for ease of use (local), 8/10 via cloud, 10/10 for quality, 9/10 for value.
Pika 2.0
Pika occupies an interesting middle ground. It is easier to use than open-source solutions but cheaper than Runway, with a fun, creative-first approach. The "Add Sound Effects" feature is a nice touch since it adds audio to your animated photo automatically. The motion quality is good but not best-in-class.
I find Pika most useful for social media content where you want something quick and engaging rather than perfectly realistic. The artistic filters and style options give your animated photos a distinctive look that works well on platforms like TikTok and Instagram Reels.
My rating: 8/10 for ease of use, 6/10 for quality, 7/10 for value.
Stable Video Diffusion (SVD)
Stability AI's open-source video model is worth mentioning because it is free and runs locally. However, compared to WAN 2.2, the quality is a step behind. SVD tends to produce more artifacts, and the motion can feel less natural. It was groundbreaking when it launched, but the field has moved fast.
That said, SVD is well-supported in ComfyUI and has a large community building workflows around it. If you are already in the Stable Diffusion ecosystem, it is a natural fit. For pure quality comparison, though, WAN 2.2 wins decisively.
Free ComfyUI Workflows
Find free, open-source ComfyUI workflows for techniques in this article. Open source is strong.
My rating: 6/10 for ease of use, 6/10 for quality, 8/10 for value (free).
How to Animate Photos Step by Step
Let me walk you through the actual process. I will cover both the easy commercial route and the more hands-on open-source approach so you can choose what fits your workflow.
Method 1: Using Runway (Beginner-Friendly)
This is the fastest path from "I have a photo" to "I have an animated video." Here is exactly what to do.
- Go to runway.ml and create a free account
- Select "Gen-3 Alpha Turbo" from the model options
- Upload your source photograph
- Write a motion prompt describing the animation you want (for example, "gentle wind blowing through hair, subtle head tilt, soft smile")
- Optionally, use the Motion Brush to paint specific regions where you want motion
- Set the duration (5 or 10 seconds) and click Generate
- Review the result, iterate on the prompt if needed, then download
The key to good results with Runway is your motion prompt. Vague prompts like "make it move" produce random, often disappointing motion. Specific prompts like "ocean waves gently rolling toward shore, seagulls flying in background, sunlight shimmering on water" give the model clear direction.
Method 2: Using WAN 2.2 via ComfyUI (Advanced)
For users who want maximum quality and control, WAN 2.2 through ComfyUI is the way to go. This requires more setup but produces superior results.
First, you need ComfyUI installed with the WAN 2.2 model. If you do not have the local hardware, you can use a cloud service like Apatero that provides pre-configured ComfyUI environments.
- Open ComfyUI and load the WAN 2.2 Image-to-Video workflow
- Connect your source image to the image input node
- Configure the CLIP text encoder with your motion prompt
- Set resolution to match your source image's aspect ratio (common choices are 832x480 or 480x832)
- Set the number of frames (81 frames at 24fps gives about 3.4 seconds)
- Adjust the CFG scale (I usually start at 5.0 and adjust from there)
- Run the workflow and wait for generation (typically 2-5 minutes depending on hardware)
- Export the resulting frames as MP4
The ComfyUI approach gives you granular control over every parameter. You can adjust denoising strength, frame count, resolution, sampler settings, and more. This flexibility matters when you are working on a specific creative vision rather than just experimenting.
Method 3: Creating Cinemagraphs
Cinemagraphs deserve their own workflow because the technique is different from full animation. The goal is selective motion, keeping most of the image perfectly still while one element moves.
Here is my preferred approach using Runway's Motion Brush.
- Upload your source image to Runway
- Select the Motion Brush tool
- Carefully paint only the area you want animated (steam, water, hair, smoke, clouds)
- Set the brush area's motion direction and intensity
- Write a prompt that describes only the motion you want (for example, "steam rising gently from coffee cup")
- Generate at 5-10 seconds with loop enabled
- Download and trim to create a seamless loop
The critical step is restraint. Paint less area than you think you need. Over-painting leads to too much motion, which ruins the cinemagraph effect. The beauty of a cinemagraph is the contrast between stillness and subtle movement.
What Makes a Good Source Photo for Animation?
Not every photo will animate well, and understanding this will save you a lot of wasted credits and frustration. I have animated hundreds of photos at this point, and patterns have emerged clearly.
Hot take: The source photo matters more than the AI model you choose. A well-composed, high-quality photograph animated with a mediocre tool will look better than a low-quality smartphone snap animated with the best model available.
Here is what works best.
Ideal source photos have these qualities:
- High resolution (at least 1024px on the shorter side, 2048px or higher is better)
- Clear focal subject with reasonable separation from the background
- Good lighting without extreme shadows or blown-out highlights
- Minimal motion blur in the original (the AI needs sharp details to work with)
- Natural poses if human subjects are involved (extreme angles confuse the model)
Photos that typically animate poorly:
Want to skip the complexity? Apatero gives you professional AI results instantly with no technical setup required.
- Heavy HDR processing or extreme filters
- Group photos with many people interacting
- Images with lots of text or graphic overlays
- Very dark or very overexposed images
- Screenshots or digitally-created graphics (the models are trained on real photographs)
I learned this the hard way when I spent 20 minutes trying to animate a heavily-filtered Instagram photo of a sunset. The model kept producing weird color shifts and artifacts because the original image had been processed so aggressively that the AI could not interpret the scene naturally. When I went back to the original unedited version, the animation was beautiful. Lesson learned.
If you are looking to improve your source photos before animation, check out our guide on AI photo tools for transforming and enhancing images. Running a quick upscale or denoise pass on your source image can significantly improve animation results.
Advanced Tips for Better Photo Animation
After months of daily use, I have compiled a list of techniques that consistently produce better results. These go beyond the basics and reflect genuine testing experience.
Prompt Engineering for Motion
The way you write your motion prompt dramatically affects the output. Think of it like directing a very literal camera operator. The AI does exactly what you describe, nothing more.
Instead of writing "person walking," try "woman taking a slow step forward with her right foot, hair gently swaying, looking slightly to the left." The more specific your motion description, the more controlled and natural the result. Include details about speed ("slowly," "gently," "quickly"), direction ("to the left," "upward," "toward camera"), and secondary motion ("hair flowing," "clothes rustling").
I keep a personal prompt library of motion descriptions that work well. A few of my favorites that consistently produce good results:
- "Gentle breeze flowing through scene, subtle light shifting, ambient motion"
- "Slow camera push-in, subject maintaining eye contact, slight smile forming"
- "Water surface gently rippling, reflections shifting, leaves floating slowly downstream"
- "Candle flame flickering gently, warm light dancing on nearby surfaces"
Resolution and Aspect Ratio Strategy
Most AI animation models work best at specific resolutions. Feeding a 6000x4000 pixel photograph directly into the model will not give you better results. In fact, it often gives worse results because the model has to downsample internally.
My approach is to resize the source image to match the model's native working resolution before upload. For WAN 2.2, that means 832x480 for landscape or 480x832 for portrait. For Runway, 1280x768 is the sweet spot. Resize your source image to these dimensions using any photo editor, keeping the aspect ratio as close as possible. This gives the model the cleanest input and produces the most consistent output.
Iterating Effectively
Your first generation will rarely be your best. Plan for 3-5 iterations. Here is my typical workflow.
On the first attempt, I use a generic prompt to see how the model interprets the image. This reveals what the AI "sees" in the photo. On the second attempt, I refine the prompt based on what worked and what looked strange. By the third or fourth attempt, I am fine-tuning specific details. I might adjust the CFG scale, change the motion intensity, or rephrase parts of the prompt.
If you are using a commercial tool, keep notes on what you changed between generations. I use a simple spreadsheet with the prompt text, settings, and a 1-10 quality rating for each output. This system has made me dramatically more efficient over time. What used to take me 10 iterations now takes 3.
Combining Multiple Tools
One of the most powerful techniques I have discovered is chaining tools together. For example, I might use an AI image generator to create a high-quality base image, then animate that generated image using WAN 2.2, and finally upscale the resulting video using Topaz Video AI.
This pipeline approach lets you leverage each tool's strengths. The image generator handles composition and style. The animation model handles motion. The upscaler handles final quality. The result is significantly better than using any single tool alone.
Common Mistakes When You Animate Photos
I see the same mistakes over and over in online communities, and I made most of them myself early on. Here is what to avoid.
Earn Up To $1,250+/Month Creating Content
Join our exclusive creator affiliate program. Get paid per viral video based on performance. Create content in your style with full creative freedom.
Expecting Too Much Motion
The number one mistake is prompting for dramatic, complex motion from a still image. If you ask the AI to make a person run, jump, and wave simultaneously, you will get a garbled mess. These models excel at subtle, natural motion. A head turn. A gentle smile. Wind through a scene. Start subtle and gradually increase complexity as you learn what works.
Ignoring Image Quality
Garbage in, garbage out. A blurry, low-resolution smartphone photo will produce a blurry, artifacted animation. Take the time to prepare your source image. Upscale if needed. Correct the white balance. Crop to a clean composition. This preparation time pays for itself many times over.
Using the Wrong Tool for the Job
Each tool has strengths. Using Runway for a complex character animation when Kling does it better wastes time and money. Using WAN 2.2 for a quick social media post when Pika would be faster is equally inefficient. Match the tool to the task.
Forgetting About Loops
If your animated photo is destined for social media, you almost certainly want it to loop seamlessly. Not all tools create looping output by default. Some offer a "ping-pong" option that plays forward and then backward, creating a natural loop. If your tool does not offer this, plan your motion prompt so the end state can transition back to the start. Gentle, oscillating motions (waves, breathing, flickering flames) loop naturally.
Neglecting Audio
An animated photo without sound feels incomplete. Consider adding ambient audio that matches the scene. Ocean sounds for a beach photo. Cafe ambiance for a coffee shop shot. Wind for an outdoor scene. Several AI tools, including Pika, offer automatic sound generation. Alternatively, free ambient sound libraries like Freesound provide thousands of loops you can pair with your animation.
Real-World Use Cases for Animated Photos
Let me share some practical applications I have seen work well, drawn from my own projects and from creators I follow.
E-Commerce Product Showcases
Static product photos are boring. Animated product photos grab attention. I helped a friend who runs an Etsy shop animate her jewelry photos, adding subtle light reflections and gentle rotation effects. Her click-through rate on social media ads increased by 40% after switching from static to animated images. The cost per animation was about $0.25, making it an absurdly high-ROI investment.
Memorial and Heritage Projects
This one is personal. I used AI animation to bring old family photos to life for my grandmother's 90th birthday. Seeing her late husband's portrait subtly animated, with natural eye movement and a gentle expression shift, was profoundly moving. Several family members were in tears. It was the most impactful thing I have done with AI.
Hot take: Heritage photo animation is the most meaningful application of this technology, and it is barely being discussed. The entire industry focuses on commercial and creative use cases, but the ability to bring deceased loved ones' photos to gentle life has enormous emotional value.
Social Media Content Creation
Short-form video dominates social media engagement, but creating video content is time-consuming and expensive. Animating existing photographs is a shortcut that actually works. A travel blogger can turn their photo archive into weeks of animated content. A real estate agent can make property photos more engaging. A food blogger can add steam, sizzle, and movement to flat-lay shots.
I have been tracking engagement metrics on animated versus static posts for the past three months. Animated photos consistently get 2-3x more engagement on Instagram and significantly higher watch time on TikTok. The Apatero blog has additional case studies if you want to dig into the data.
Film and Video Pre-Production
Animating concept art or storyboard images gives directors and producers a rough sense of how scenes will flow before committing to expensive production days. This use case is growing fast in independent film production, where budgets are tight and every shoot day needs to count.
How Photo Animation Will Evolve in 2026 and Beyond
The pace of improvement in this space is staggering. Based on the research papers I have been following and the beta tools I have been testing, here is where things are heading.
Longer outputs are coming. Current models generate 3-10 seconds. By mid-2026, expect 30-second to one-minute clips from a single photo. The architecture changes needed for this are already present in research papers from Google DeepMind and other labs.
Interactive animation is on the horizon. Instead of describing motion in text, you will be able to drag elements in the image to indicate where they should move. Runway's Motion Brush is a primitive version of this, but next-generation interfaces will make it far more intuitive.
Multi-image animation will become standard. Rather than animating a single photo, you will provide a start image and an end image, and the AI will generate the transition between them. WAN 2.2 already supports this through first-last-frame conditioning, and it produces remarkable results.
Audio-driven animation will improve dramatically. Imagine uploading a photo of a singer and an audio track, and getting back a perfectly lip-synced performance. The technology exists today in rough form, but it will be seamless by late 2026.
For anyone interested in staying on the cutting edge of AI video generation, I recommend following developments through platforms like Hugging Face, which hosts model releases and research papers as they drop.
Frequently Asked Questions About Animating Photos with AI
Can I animate any photo with AI?
Technically yes, but results vary wildly. High-resolution photos with clear subjects, good lighting, and minimal processing produce the best animations. Heavily filtered images, screenshots, and low-resolution photos will yield poor results. For best results, start with an unedited, well-lit photograph.
Is it free to animate photos with AI?
Several free options exist. WAN 2.2 and Stable Video Diffusion are free open-source models (you need a capable GPU or cloud access). Pika and Kling offer free tiers with limited credits. Runway offers a short free trial. For unlimited free use, open-source models through ComfyUI are your best option.
How long can an AI-animated photo be?
Most current tools produce 3-10 seconds of video from a single image. Kling supports up to 10 seconds. WAN 2.2 typically generates 3-5 seconds. Some tools allow you to extend animations by feeding the last frame back as a new starting image, but quality degrades with each extension.
What resolution does the animated output have?
Output resolution depends on the tool. Runway Gen-3 outputs at 1280x768. Kling supports up to 1080p. WAN 2.2's output resolution depends on your configuration but typically ranges from 480p to 720p. Higher resolutions require more VRAM and processing time.
Can I animate old black-and-white photos?
Absolutely. In fact, old portraits often animate very well because they typically have simple compositions with a clear focal subject. For best results, colorize the photo first using an AI colorization tool, then animate the colorized version. The combination of colorization and animation can bring historical photos to life in a remarkable way.
Is it legal to animate photos of other people?
This is a gray area that varies by jurisdiction. Generally, animating your own photos is fine. Animating photos of public figures for editorial or artistic purposes is usually protected. Using AI animation to create misleading content of real people could violate deepfake laws in some jurisdictions. When in doubt, get consent and always disclose that the content is AI-generated.
What file formats work best for input photos?
PNG and high-quality JPEG work well for most tools. Avoid heavily compressed JPEGs, which introduce artifacts that the animation model will amplify. If your source image is a RAW file, export it as a high-quality PNG before uploading. Most tools do not accept RAW formats directly.
Can I use animated photos commercially?
Terms vary by platform. Runway and Pika allow commercial use on paid plans. Open-source models like WAN 2.2 generally have permissive licenses that allow commercial use. Always check the specific license terms of the tool you are using. If you created or own the source photograph, you generally retain rights to derivatives.
How does AI photo animation differ from traditional animation?
Traditional animation requires manually creating each frame, either by drawing or manipulating elements in software like After Effects. AI photo animation is automated. The AI generates all intermediate frames based on your source image and text prompt. Traditional animation offers more creative control but takes hours or days. AI animation takes seconds but gives you less precise control over the result.
What hardware do I need to animate photos locally?
For cloud-based tools like Runway, Kling, or Pika, you only need a web browser and internet connection. For local open-source models like WAN 2.2, you need a modern NVIDIA GPU with at least 12GB of VRAM (an RTX 3060 12GB as minimum, RTX 4090 ideal), 32GB of system RAM, and a recent version of Python with PyTorch installed. If you lack the hardware, cloud GPU services or platforms like Apatero provide access to these models without local GPU requirements.
Wrapping Up
The ability to animate photos with AI is one of those capabilities that sounds futuristic until you try it, and then it immediately becomes part of your creative toolkit. Whether you are a professional content creator looking to increase engagement, a hobbyist exploring creative possibilities, or someone who just wants to see their favorite photos come alive, the tools available today are genuinely impressive.
My recommendation for most people is to start with Kling's free tier or Runway's trial to understand the basics. Once you see what is possible and develop a sense for what works, graduate to WAN 2.2 through ComfyUI for maximum quality. The learning curve is steeper, but the results are worth it.
The most important thing I have learned from months of testing is that patience and iteration matter more than choosing the "best" tool. Spend time learning how to write effective motion prompts. Prepare your source images properly. Plan for multiple iterations. And keep a record of what works so you can improve over time.
If you want to go deeper, check out our guides on creating AI video from images for longer video generation, and AI photo tools for preparing your source images. The combination of image enhancement plus animation produces results that neither technique achieves alone.
Now go dig through your photo library. I guarantee you have dozens of photos that are just waiting to come alive.
Make AI images and video in your browser
Characters, video, photo packs. No GPU, no setup. Your first generation is free.
Related Articles

10 Best AI Influencer Generator Tools Compared (2025)
Comprehensive comparison of the top AI influencer generator tools in 2025. Features, pricing, quality, and best use cases for each platform reviewed.

5 Proven AI Influencer Niches That Actually Make Money in 2025
Discover the most profitable niches for AI influencers in 2025. Real data on monetization potential, audience engagement, and growth strategies for virtual content creators.

AI Action Figure Generator: How to Create Your Own Viral Toy Box Portrait in 2026
Complete guide to the AI action figure generator trend. Learn how to turn yourself into a collectible figure in blister pack packaging using ChatGPT, Flux, and more.