How to Fix AI Generated Backgrounds: Complete Artifact Removal Guide
Master inpainting, outpainting, and artifact removal for AI generated backgrounds. Professional techniques for smooth results.
Make AI images and video in your browser
Characters, video, photo packs. No GPU, no setup. Your first generation is free.
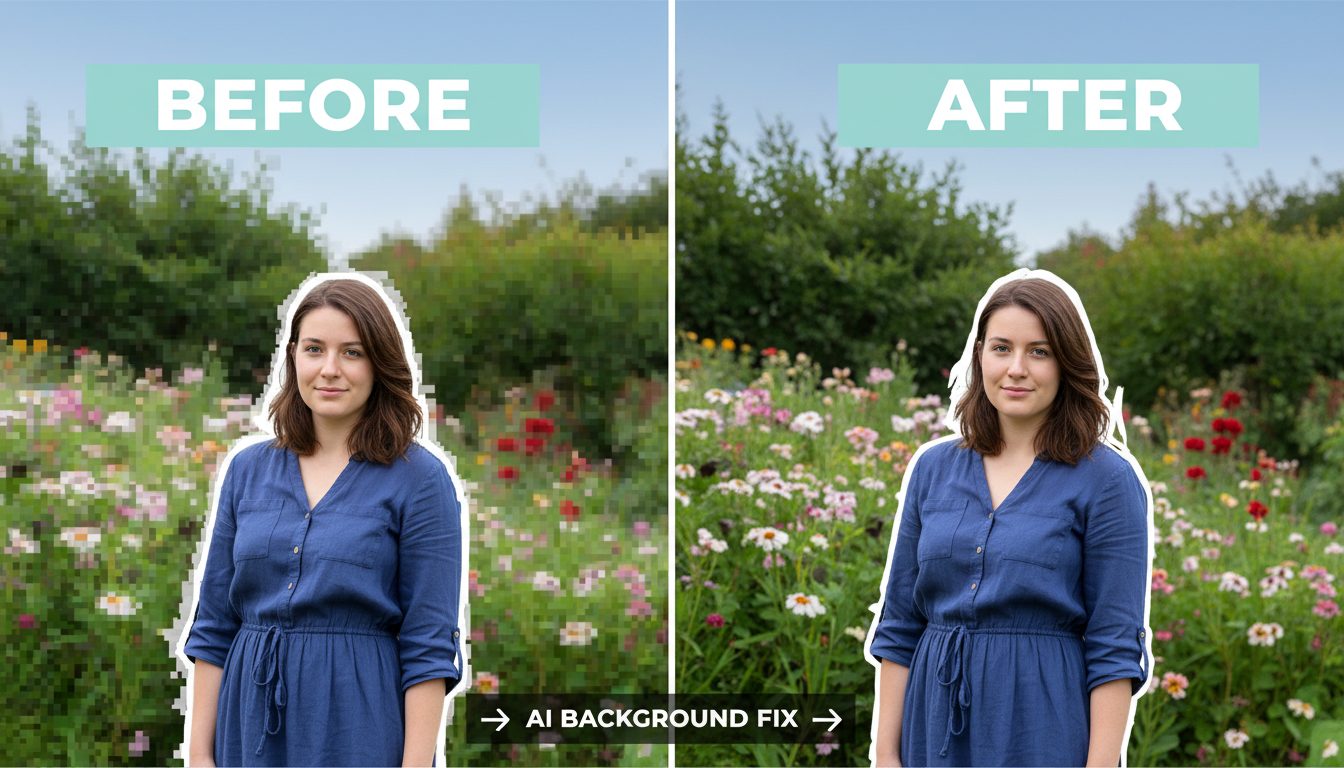
Every AI image generator has the same weakness. Backgrounds. They're either too clean, too messy, or have those telltale seams and artifacts that scream "AI made this." I've spent countless hours learning to fix these issues, and I'm sharing everything that actually works.
Quick Answer: Most AI background problems are fixed through targeted inpainting with proper mask blur, matching the original generation model and settings, and using specialized techniques like soft inpainting for clean blends. The key is understanding what causes each artifact type.
- Visible seams: Increase mask blur to 16-32px and use soft inpainting
- Style mismatches: Use the same model and settings as the original
- Edge artifacts: Apply small inpaint passes at 0.4 denoise
- Outpainting issues: Match aspect ratios and use directional prompts
- The right tool matters: Flux Fill excels at smooth edits
The Most Common AI Background Problems
Before fixing problems, you need to diagnose them. Here's what I see most often:
1. Visible Seams and Edges
The classic tell. You can see exactly where the AI generated content meets the original or where outpainting started. It looks like a bad Photoshop job.
Cause: Insufficient blending, mask too sharp, or denoise too high at edges.
2. Style Inconsistency
Part of the image looks photorealistic, another part looks painted, and another part looks like a different AI model entirely.
Cause: Using different models, wrong settings, or generation across multiple sessions.
3. Mushy or Blurry Areas
Certain regions look soft and undefined while the rest is sharp. Often happens at transition zones.
Cause: Over-blending, too much mask blur, or denoise too low.
4. Repeating Patterns
The AI filled areas with obviously tiled or repeating elements. Bricks that repeat too perfectly, clouds in a grid, grass with suspicious regularity.
Cause: Model filling unknown areas with safe, repetitive content.
5. Context Mismatch
The generated background doesn't match the scene. Indoor elements appearing outdoors, wrong lighting direction, incongruent objects.
Cause: Insufficient prompt guidance or letting the AI guess context.
The Fix: Inpainting Fundamentals
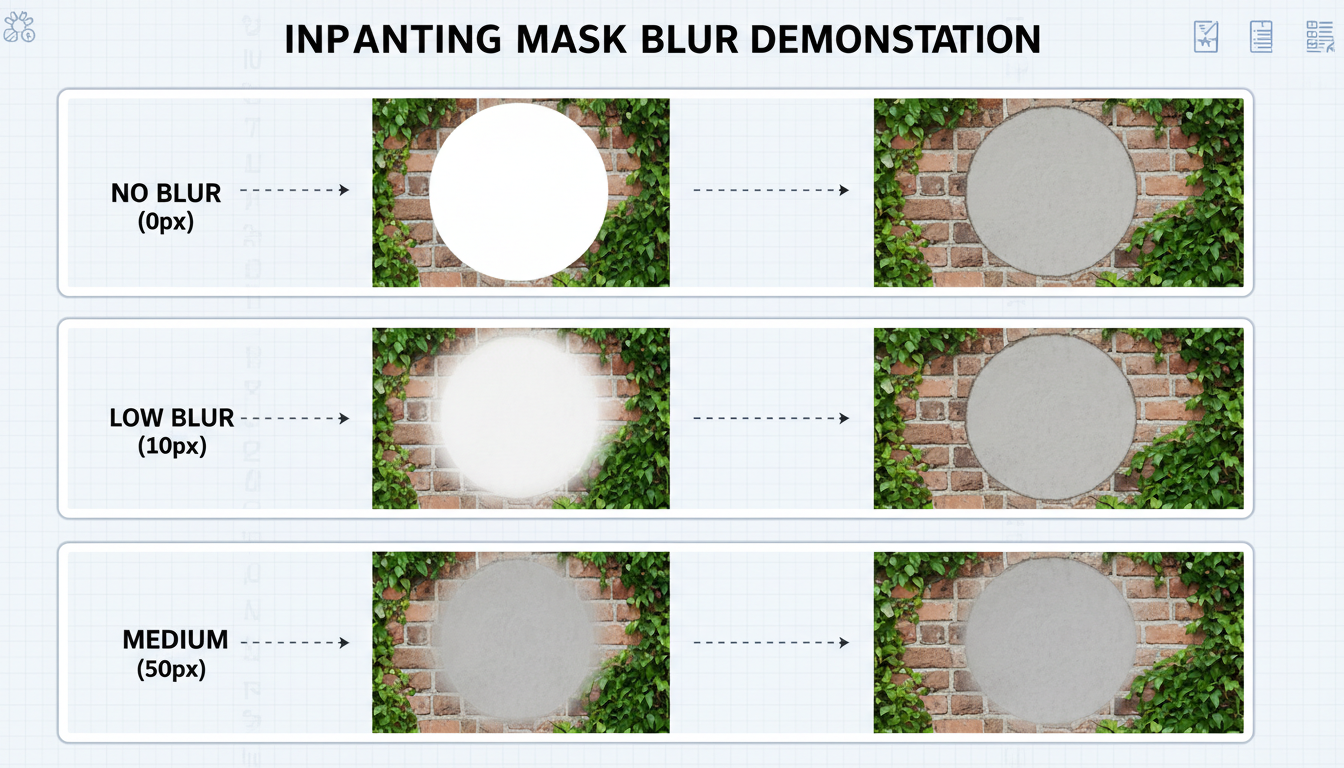 Different mask blur levels produce dramatically different blending results
Inpainting is your primary tool for fixing backgrounds. Here's how to use it properly:
Mask Blur Is Critical
The most common mistake is using sharp masks. The transition between edited and unedited areas becomes visible.
Sharp mask (blur 0): Creates hard edges, visible seams Low blur (4-8px): Better but still detectable Optimal blur (16-32px): Smooth transitions, natural blend Too much blur (48+px): Affects areas you didn't want to change
I default to 24px mask blur for most work. Adjust based on image resolution.
Denoise Strength Strategy
Denoise controls how much the AI changes the masked area:
0.2-0.3: Barely changes anything, just adds noise 0.4-0.5: Light cleanup, maintains structure 0.6-0.7: Moderate changes, good for artifacts 0.8-1.0: Complete regeneration
For background fixes, I usually stay in the 0.5-0.7 range. High enough to fix problems, low enough to maintain consistency.
Soft Inpainting
If your tool supports it (A1111, ComfyUI with right nodes), enable soft inpainting. It applies the mask as a gradient rather than binary, creating even smoother transitions.
Settings that work:
- Mask blur: 16px
- Soft inpainting: enabled
- Denoise: 0.6-0.7
Model Matching: The Key to Consistency
Here's what nobody tells you: the biggest cause of style mismatch is using different models for generation and fixing.
If you generated the original with SDXL Juggernaut, fix it with SDXL Juggernaut. Not base SDXL. Not a different fine-tune. The same model.
Why this matters:
Free ComfyUI Workflows
Find free, open-source ComfyUI workflows for techniques in this article. Open source is strong.
Each model has a unique "style fingerprint." Even subtle differences become visible when patching areas. The fixed regions will feel "off" even if you can't immediately identify why.
When You Don't Have the Original Model
Sometimes you're fixing images where you don't know the original model. Options:
- Use Flux Fill: It's trained specifically for inpainting and adapts well
- Apply full image img2img pass: After fixing, run the whole image through at 0.2-0.3 denoise to unify style
- Accept imperfection: Some images can't be perfectly fixed
Edge Cleanup: The Detail Work
Edges are where most artifacts concentrate. Here's my cleanup workflow:
Step 1: Identify Problem Edges
Look for:
- Halos (light or dark lines along edges)
- Jagged transitions
- Color bleeding
- Unnaturally sharp cutoffs
Step 2: Create Precise Masks
Use a thin brush to mask just the edge area. Don't mask good content. The goal is minimal intervention.
Step 3: Run Targeted Inpaint
Settings:
- Mask blur: 8-12px (lower than usual for precision)
- Denoise: 0.4-0.5 (preserve surrounding context)
- Steps: 25+ (more steps for better edge detail)
Step 4: Repeat If Needed
Edges often need 2-3 passes. Better to do multiple gentle passes than one aggressive one.
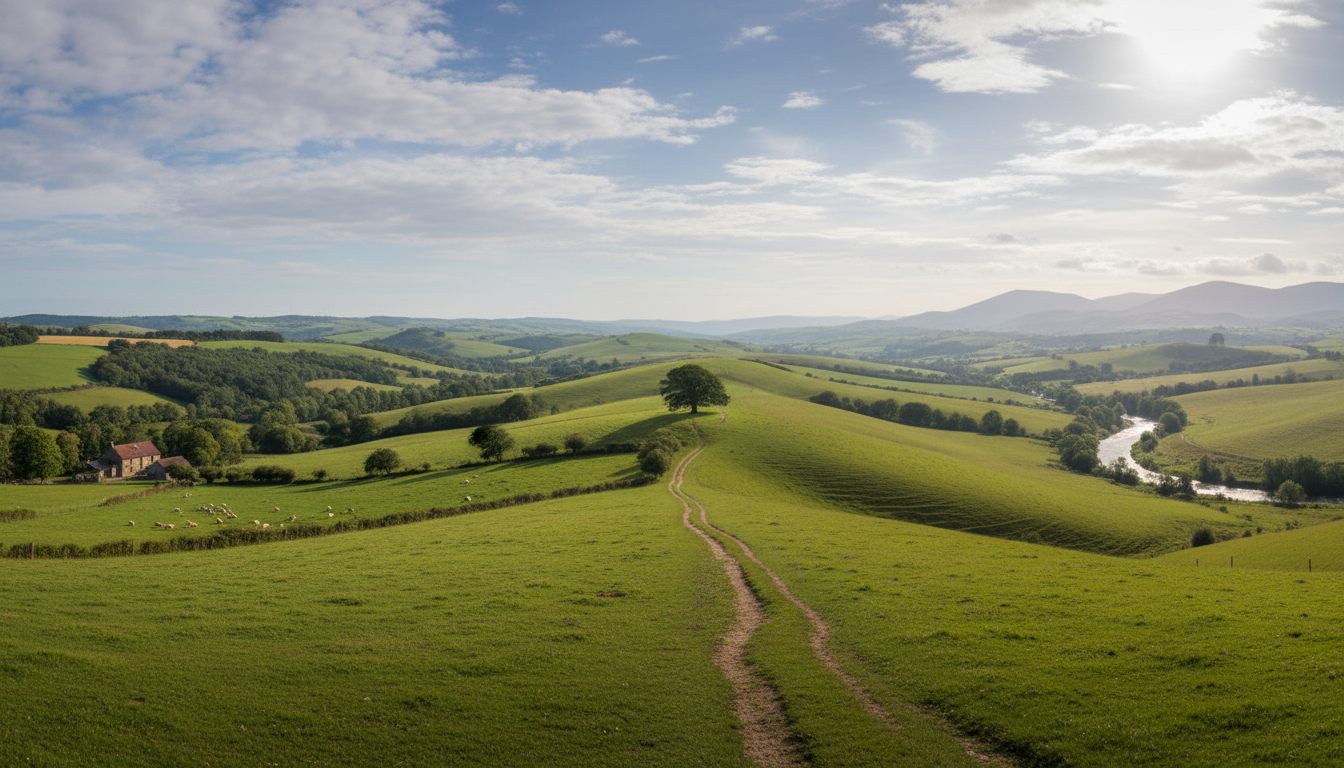 Successful outpainting extends scenes naturally without visible boundaries
Outpainting: Extending Backgrounds Smoothly
Outpainting expands the image canvas. It's essentially inpainting at the edges, but with unique challenges.
The Two Common Problems
1. Blurry edges: Output becomes soft at the boundary 2. Visible seams: Clear line where original ends and extension begins
Solutions That Work
For blurry edges:
Want to skip the complexity? Apatero gives you professional AI results instantly with no technical setup required.
- Increase sampling steps (30+)
- Use higher denoise (0.8-0.9)
- Match the sampling method to original
- Ensure enough context overlap
For visible seams:
- Extend mask into original image by 10-20%
- Use soft inpainting with high blur
- Run a second pass just on the seam area
Directional Prompting
When outpainting, tell the AI what to extend:
Left extension: "Continuation of forest scene, trees extending to the left, consistent lighting"
Bottom extension: "Ground continuing downward, rocks and grass matching scene above"
This guidance prevents the AI from inventing inappropriate content.
Specialized Tools and Models
Flux Fill (Best for Most Cases)
Flux Fill is purpose-built for inpainting. Unlike using base Flux with masks, Fill was trained specifically for simple editing.
Advantages:
- Superior edge handling
- Better style matching
- Designed for fill operations
Alimama Inpainting ControlNet
For detailed extensions with Flux, the Alimama ControlNet provides additional guidance. Good for complex scenes where normal inpainting struggles.
SDXL with Fooocus Inpaint
If you're in the SDXL ecosystem, Fooocus has excellent inpaint handling. Often produces better results than base A1111 inpainting.
Common Scenarios and Solutions
Scenario 1: Product on AI Background
You have a real product photo and want to place it on an AI-generated background.
Problem: The product edges look pasted, lighting doesn't match.
Earn Up To $1,250+/Month Creating Content
Join our exclusive creator affiliate program. Get paid per viral video based on performance. Create content in your style with full creative freedom.
Solution:
- Place product with rough cutout
- Inpaint edges with 24px blur, 0.5 denoise
- Use reference lighting prompt ("soft light from upper left")
- Consider adding shadows manually or through another pass
Scenario 2: Character Cutout with Wrong Background
Generated a great character but the background is garbage.
Problem: Need to replace background while keeping character.
Solution:
- Mask everything except character
- Use high denoise (0.85-0.95) for full replacement
- Include detailed background description
- Run character edge cleanup pass afterward
Scenario 3: Panorama from Multiple Generations
Trying to stitch multiple AI images into a wider scene.
Problem: Each image has slightly different style/color.
Solution:
- Overlap images by 20-30%
- Inpaint only the overlap zones
- Run color matching (Photoshop or similar)
- Final unified pass at 0.15 denoise across everything
Scenario 4: Removing Unwanted Elements
There's something in the background that shouldn't be there.
Problem: Removal leaves obvious blank spot.
Solution:
- Mask the unwanted element plus some surrounding area
- Use 0.7-0.8 denoise for complete replacement
- Prompt should describe what should be there instead
- Multiple passes if the area is large
My Standard Background Fix Workflow
After fixing thousands of background issues, here's my standard approach:
Phase 1: Assessment (2 minutes)
- Identify all problem areas
- Classify each problem type
- Plan fix order (start with biggest issues)
Phase 2: Major Fixes (5-10 minutes)
- Handle large problematic areas first
- Use full regeneration inpainting (0.8-0.9 denoise)
- Focus on one area at a time
Phase 3: Edge Cleanup (5-10 minutes)
- Address all visible seams
- Use gentle settings (0.4-0.5 denoise)
- Multiple small passes
Phase 4: Style Unification (2-5 minutes)
- Run full image at 0.15-0.2 denoise
- This blends any remaining style differences
- Keep color and composition, just unify style
Phase 5: Final Check
- View at 100% zoom
- Look for remaining artifacts
- Touch up any spots missed
Using Platforms for Quick Fixes
If you don't want to manage all this yourself, platforms like Apatero.com offer automated inpainting with good defaults. I use it for quick fixes when I don't need precise control.
The automatic mask detection and sensible defaults handle probably 70% of common background issues. For the remaining 30%, manual workflows in ComfyUI give better results.
Frequently Asked Questions
What's the best tool for AI background fixes?
For most cases, Flux Fill or your original generation model with proper inpainting settings.
How do I match the style when fixing old images?
Run the whole image through img2img at low denoise (0.15-0.2) after fixing. This unifies the style.
Why does my inpainting look blurry?
Usually too much mask blur or too low denoise. Try reducing blur to 16px and increasing denoise to 0.65.
Can I fix backgrounds in video frames?
Yes, but consistency across frames is challenging. Fix key frames, then interpolate or apply batch processing with locked seeds.
How do I remove artifacts from generated backgrounds?
Targeted inpainting on just the artifact area. Use minimal masks and moderate denoise (0.5-0.6).
What causes the "halo" effect around subjects?
Usually from masking too close to the subject edge. Include 5-10 pixels of the subject in your mask.
How do I fix repeating patterns in AI backgrounds?
Inpaint with creative prompts that describe variety: "varied grass lengths, natural irregularity, organic patterns"
Should I use different settings for different resolutions?
Mask blur should scale with resolution. 16px blur on 512x512 needs ~32px on 1024x1024.
What about AI upscalers for fixing backgrounds?
Upscalers can hide some artifacts but also amplify others. Better to fix at generation resolution, then upscale.
How long should background fixes take?
Simple fixes: 2-5 minutes. Complex scenes: 15-30 minutes. Anything longer means the original might need regeneration.
Wrapping Up
Fixing AI backgrounds is a skill that improves with practice. The concepts are straightforward: blend properly, match styles, and use appropriate tools. The execution requires experience.
Start with the fundamentals: proper mask blur and denoise settings. Those alone solve 60% of problems. Add model matching and edge cleanup, and you handle 90%. The remaining 10% requires specialized techniques for unusual cases.
Every AI image generator produces fixable backgrounds. The question is whether you know how to fix them. Now you do.
Make AI images and video in your browser
Characters, video, photo packs. No GPU, no setup. Your first generation is free.
Related Articles

10 Best AI Influencer Generator Tools Compared (2025)
Comprehensive comparison of the top AI influencer generator tools in 2025. Features, pricing, quality, and best use cases for each platform reviewed.

5 Proven AI Influencer Niches That Actually Make Money in 2025
Discover the most profitable niches for AI influencers in 2025. Real data on monetization potential, audience engagement, and growth strategies for virtual content creators.

AI Action Figure Generator: How to Create Your Own Viral Toy Box Portrait in 2026
Complete guide to the AI action figure generator trend. Learn how to turn yourself into a collectible figure in blister pack packaging using ChatGPT, Flux, and more.