ComfyUI Image Upscaling: Workflows for High-Resolution AI Art
Master image upscaling in ComfyUI with various upscaler models, tiled upscaling, and ultimate SD upscale techniques for maximum quality AI art.
Make AI images and video in your browser
Characters, video, photo packs. No GPU, no setup. Your first generation is free.
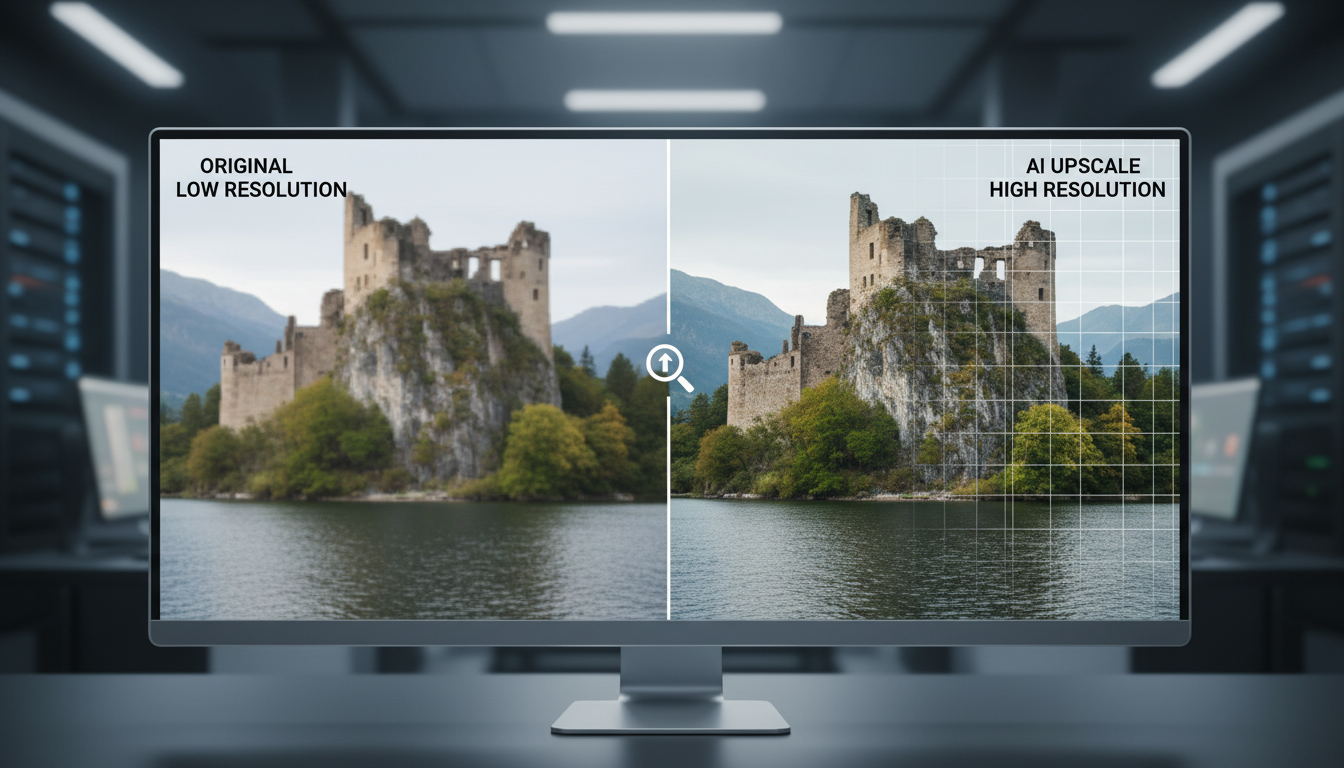
Standard AI image generation produces moderate resolutions that may need upscaling for final use. ComfyUI offers multiple upscaling approaches, from simple model-based upscaling to sophisticated multi-pass techniques that enhance detail while increasing resolution.
This guide covers upscaling workflows from basic to advanced, helping you produce high-resolution output for any use case.
Quick Answer: ComfyUI upscaling ranges from simple upscaler models (ESRGAN, Real-ESRGAN) to complex multi-pass techniques (Ultimate SD Upscale, tiled VAE). For quick 2x upscaling, use a quality upscaler model. For maximum quality at higher scales, combine upscaler models with img2img refinement passes. VRAM limitations require tiled approaches for large images.
:::tip[Key Takeaways]
- ComfyUI Image Upscaling: Workflows for High-Resolution AI Art represents an important development in its field
- Multiple approaches exist depending on your goals
- Staying informed helps you make better decisions
- Hands-on experience is the best way to learn :::
- Upscaler model selection and use
- Simple upscaling workflows
- Multi-pass upscaling techniques
- Tiled upscaling for VRAM efficiency
- Quality vs performance trade-offs
Understanding Upscaling Options
Upscaling Approaches
Model-based upscaling: Neural network upscalers trained to add detail while scaling.
Latent upscaling: Scaling in latent space with regeneration.
Tiled upscaling: Processing sections for VRAM efficiency.
Multi-pass: Combining techniques for maximum quality.
Quality Considerations
Upscaling trade-offs:
Resolution vs detail: Higher scale can introduce artifacts.
Speed vs quality: Better results take more time.
VRAM vs size: Larger images need more memory.
Preservation vs enhancement: Keeping original vs adding detail.
Upscaler Models
Popular Upscaler Types
ESRGAN/Real-ESRGAN:
- Good general-purpose upscaling
- Various trained variants
- Balanced quality/speed
4x-UltraSharp:
- Excellent detail enhancement
- Good for photorealistic content
- Slightly slower
Remacri/Nomos:
- Community-developed options
- Various optimization targets
- Worth testing for your use case
Swin2SR:
- More recent architecture
- Good quality results
- Higher VRAM usage
Model Selection
Choose based on content:
Photorealistic: 4x-UltraSharp, Real-ESRGAN Anime/Illustration: 4x-AnimeSharp, specialized anime upscalers General purpose: Real-ESRGAN, Remacri
Test multiple options on your specific content.
Installing Upscalers
Place upscaler models in appropriate folder:
ComfyUI/models/upscale_models/
Download from sources like OpenModelDB or Civitai.
Simple Upscaling Workflow
Basic Upscaler Node
The simplest approach:
[Load Image]
      ↓
[Load Upscale Model]
      ↓
[Upscale Image (Using Model)]
      ↓
[Save Image]
This applies the upscaler directly without additional processing.
Settings
Model selection: Choose appropriate upscaler.
Scale factor: Usually 2x or 4x depending on model.
When to Use
Simple upscaling works for:
- Quick previews
- Already high-quality source images
- When speed matters most
- Minor resolution increases
Latent Upscaling
Upscaling in Latent Space
Scale before decoding:
[Generate Image (KSampler)]
        ↓
[Upscale Latent]
        ↓
[KSampler] ← Low denoise for refinement
        ↓
[VAE Decode]
        ↓
[Save Image]
Benefits
Detail addition: Regeneration adds fine details.
Style consistency: Uses same model for enhancement.
Quality potential: Can produce better results than pure upscaling.
Free ComfyUI Workflows
Find free, open-source ComfyUI workflows for techniques in this article. Open source is strong.
Denoise Settings
For latent upscale refinement:
0.2-0.4: Light detail enhancement, preserves original closely.
0.4-0.6: Moderate enhancement, more detail addition.
0.6+: Significant changes, may alter composition.
Start low and increase if needed.
Multi-Pass Upscaling
Ultimate SD Upscale
Combining upscaler with img2img passes:
First pass: Upscale to intermediate resolution.
Second pass: Img2img refinement at full resolution.
Optional third: Final polish pass.
Implementation
[Load Image]
      ↓
[Upscale Image (Using Model)] ← 2x
      ↓
[VAE Encode]
      ↓
[KSampler] ← denoise 0.3-0.5
      ↓
[VAE Decode]
      ↓
[Upscale Image (Using Model)] ← 2x again
      ↓
[VAE Encode]
      ↓
[KSampler] ← denoise 0.2-0.3
      ↓
[VAE Decode]
      ↓
[Save Image]
Quality Gains
Multi-pass produces:
- More coherent detail addition
- Better texture quality
- Reduced upscaling artifacts
- Higher maximum quality
Trade-off is significantly longer processing time.
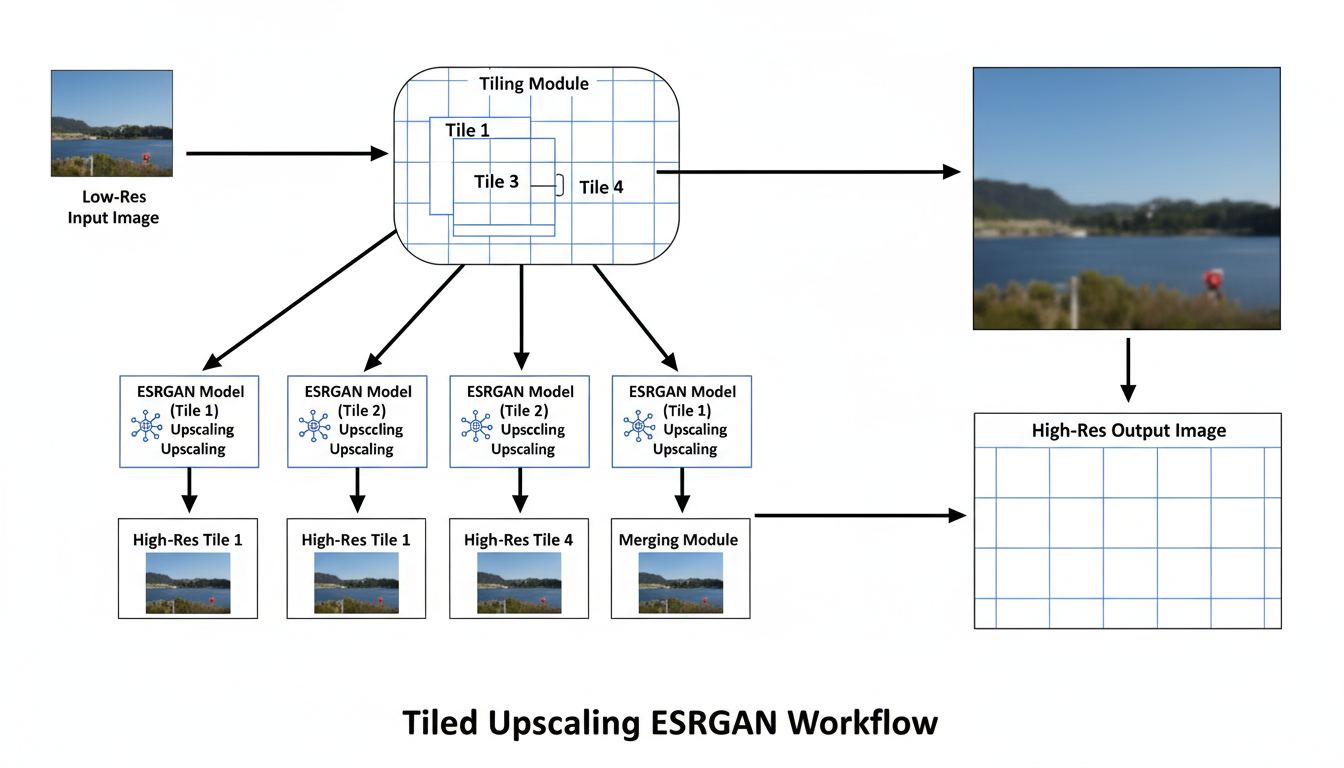
Tiled Upscaling
Why Tiling
Large images exceed VRAM:
- 2048x2048 at 8GB may struggle
- 4096x4096 needs significant VRAM
- Tiling processes sections sequentially
Tiled VAE
For decoding large images:
Tiled VAE Decode: Process VAE in tiles.
Want to skip the complexity? Apatero gives you professional AI results instantly with no technical setup required.
Benefits: Enables large images on limited VRAM.
Trade-offs: Slightly longer, potential tile boundaries.
Tiled Diffusion
Ultimate SD Upscale with tiles:
- Process upscale in overlapping sections
- Blend between tiles
- Enables very large outputs
Tile Settings
Tile size: 512 or 768 typical.
Overlap: 64-128 pixels for smooth blending.
Batch size: Adjust based on VRAM.
Workflow Optimization
Choosing Approach by Use Case
Quick preview: Simple upscaler only.
Final output: Multi-pass with refinement.
Very large: Tiled approach required.
Speed priority: Single pass with good upscaler.
Quality priority: Multiple passes with lower denoise.
Resolution Planning
Plan your target:
Source: Typical 512 or 1024 from generation.
Target: What final size do you need?
Earn Up To $1,250+/Month Creating Content
Join our exclusive creator affiliate program. Get paid per viral video based on performance. Create content in your style with full creative freedom.
Steps: 2x or 4x per pass.
Iterations: How many enhancement passes.
VRAM Management
Handle memory efficiently:
- Enable tiled processing if needed
- Process one image at a time for large outputs
- Use lower precision if struggling
- Close other applications
Common Issues and Solutions
Blurry Results
Causes:
- Weak upscaler model
- Too aggressive denoise reducing detail
- Source image too low quality
Solutions:
- Try different upscaler
- Reduce denoise in refinement
- Start with better quality generation
Visible Tile Boundaries
Causes:
- Insufficient overlap
- Inconsistent processing between tiles
- Denoise too high in tiled mode
Solutions:
- Increase tile overlap
- Use consistent settings
- Lower denoise for tiled processing
Detail Hallucination
Causes:
- Denoise too high
- Too many refinement passes
- Model adding inappropriate detail
Solutions:
- Reduce denoise settings
- Fewer passes
- Different upscaler model
Memory Errors
Causes:
- Image too large for VRAM
- Too many simultaneous operations
Solutions:
- Enable tiled processing
- Reduce tile size
- Lower batch size
Quality Assessment
Checking Results
Evaluate upscaled images:
Zoom inspection: Look at 100% zoom.
Compare to source: Check preservation.
Detail quality: Are added details appropriate?
Artifact check: Look for upscaling problems.
Common Artifacts
What to watch for:
Oversharpening: Halos around edges.
Texture repetition: Unnatural patterns.
Blur patches: Areas lacking detail.
Color shifts: Changed colors from original.
Frequently Asked Questions
What's the best upscaler for photorealistic images?
4x-UltraSharp and Real-ESRGAN work well. Test both on your specific content.
How much can I upscale?
2x-4x per pass is typical. Beyond 4x typically needs multiple passes.
Does upscaling add real detail?
Sort of. AI upscalers add plausible detail based on training. It's generated, not recovered.
Why does upscaling take so long?
Multi-pass and tiled approaches process images multiple times. Quality requires time.
Can I upscale any image in ComfyUI?
Yes, but results depend on source quality. Better source = better upscale.
What tile size should I use?
512 is safe for most VRAM. 768 or higher if you have overhead.
Should I upscale during generation or after?
After is more flexible. Generation at higher resolution is also option if VRAM allows.
How do I handle images with both photorealistic and stylized elements?
General purpose upscalers work best. Or upscale regions separately.
Conclusion
ComfyUI upscaling ranges from simple one-step processes to complex multi-pass workflows. Your choice depends on quality requirements, available VRAM, and time constraints.
For most use cases, start with a quality upscaler model like Real-ESRGAN for quick results. When quality matters most, add img2img refinement passes with low denoise. For large outputs, enable tiled processing to work within VRAM limits.
For character-specific upscaling that maintains consistency, see our character consistency guide. For basic ComfyUI orientation, check our essentials guide.
Make AI images and video in your browser
Characters, video, photo packs. No GPU, no setup. Your first generation is free.
Related Articles

10 Most Common ComfyUI Beginner Mistakes and How to Fix Them in 2025
Avoid the top 10 ComfyUI beginner pitfalls that frustrate new users. Complete troubleshooting guide with solutions for VRAM errors, model loading...

25 ComfyUI Tips and Tricks That Pro Users Don't Want You to Know in 2025
Discover 25 advanced ComfyUI tips, workflow optimization techniques, and pro-level tricks that expert users use.

360 Anime Spin with Anisora v3.2: Complete Character Rotation Guide ComfyUI 2025
Master 360-degree anime character rotation with Anisora v3.2 in ComfyUI. Learn camera orbit workflows, multi-view consistency, and professional...